Tech Tip: Maintaining Your Brake System
Like everything else on your motorcycle, your brakes need maintenance to remain at their best. In addition to making sure the pads are in good condition, brake fluid needs regular attention and the caliper and the seals need to be inspected and cleaned. CAUTION: These maintenance operations are strongly recommended to be carried out by a highly skilled mechanic, particularly when servicing the caliper. If you have any doubts whatsoever about your ability to perform these procedures, seek the assistance of a professionally trained mechanic.
Brake Fluid
Brake fluid will lose its performance over time when it has absorbed water and has been heat cycled a number of times. Some top level race teams change their fluid after every race event. Most street bikes can get away with changing the fluid once a year.
Your situation will depend on a number of factors. If you are in doubt, change it.
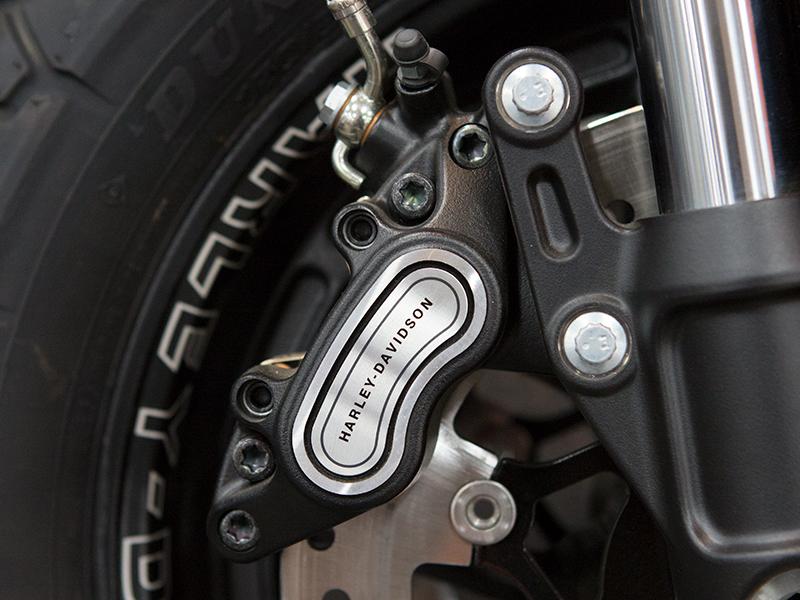
Changing the fluid is not as simple as just flushing new fluid through the lines. If you look at how your caliper is constructed, you will notice that the bleed screw is located right next to the banjo bolt.
By just flushing new fluid through the lines, as you would during a normal bleeding procedure, the only fluid change that occurs in the caliper is right in the area of the banjo and the bleeder. All of the old fluid below the bleeder and in the back side of the caliper remains behind, and this is the fluid that gets the most heat and stress of the whole system.
Flushing the fluid will be an improvement, but to do the job completely it is necessary to disassemble the caliper, remove all the pistons and seals, clean all the components, reassemble using fresh fluid as a lubricant for the seals and pistons, and refill with new fluid. (NOTE: Never use grease or other lubricants to assemble the caliper. Grease will interact with brake fluid and cause a number of problems. The only fluid that should be in contact with the components of your calipers is brake fluid. It is a good idea to pick a type and brand of brake fluid and stick with it. We recommend DOT4 and DOT5.1 fluids. NEVER use DOT5 fluid in a system that has been filled with DOT4 or DOT5.1. They will react with each other and form a jelly-like substance that will be difficult to remove, not to mention render the system unusable. DOT4 and DOT5.1 are compatible with each other, although it is best to completely disassemble and clean the whole system before changing DOT types of fluid.
Caliper
Seals: As you use your brake system, the pads wear, and brake dust settles on surfaces within the caliper. This dust can act to draw brake fluid from underneath the caliper piston seal, and the seal will stick to the piston. As the pads wear, the pistons with stuck seals will not come further out to follow the pad, and your brake lever travel will increase. It is a good idea that whenever you have your wheel or caliper removed, to stroke the brake lever a couple of times, to push the pistons a short way out of the caliper. Then, using a small pry instrument, push the pistons back into the caliper. Always push the pistons back in evenly, if they get cocked sideways in the bore of the caliper, you can damage the pistons, the seals and the caliper body itself. For piston removal with center bore of 15 mm to 28 mm we recommend using the Motion Pro Brake Caliper Piston Tool.
Be careful not to push the pistons too far out of the calipers, as if they come out all the way, you will obviously have to start all over reassembling and bleeding the system. (IMPORTANT: Never pry on the friction material surface of the pads. Slide both pads to one side and lever on the back of the pads.) Do not use excessive pressure, the pistons should slide easily back into the caliper. If they do not do so, there is another problem with the piston. Repeat this process a few times. This will relubricate the piston and seal interface, and restore your normal lever travel. If you have a two caliper system, leave one installed on the rotor when you are performing this procedure, then remount that caliper and repeat on the other side. If both calipers are dismounted to the rotors, pushing in the pistons on one caliper can push out the pistons on the other!
Brake Pad Pins: Inspect the brake pad pins regularly for wear as any wear will interfere with the movement of the brake pads and will significantly reduce brake performance. If there is any visible wear on the pin that changes its dimensions, that pin should be replaced.
Bleeding the System
Bleeding the system properly is critical to ensure that all of the air is removed from all of the components. A complete absence of air in the system serves two purposes. One, air is compressible, and if there is air in the system, it will result in a mushy, poor feel at the lever. Two, air in the system will expand after the lever is released, resulting in incomplete retraction of the pistons in the caliper, possibly increasing pad drag.
Preparation for bleeding
Brake fluid is highly corrosive to painted surfaces, and due care must be taken to protect any finished surfaces around where you will be working. Also, brake fluid can contaminate your brake pads, resulting in lowered pad performance. Be careful not to spill any fluid on the pads.
The most important part of bleeding a brake system is to understand how air in the system behaves so that you can deal with removing it efficiently. Air will want to rise to high points in the brake system, and in some cases can cause a complete fluid blockage such as in the small diameter of the remote reservoir line.
Manual Bleeding Procedure:
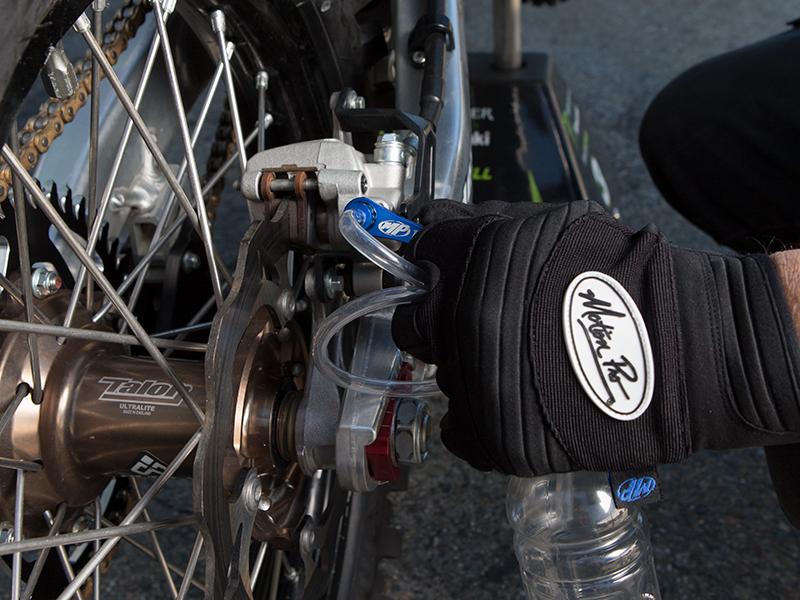
1. Bleeding the air out of any hydraulic system takes time and patience. Motion Pro has an awesome tool called the Mini Bleeder that will make this job as easy and convenient as possible. Check out the article in this newsletter for details on the Mini-Bleeder. When changing the fluid in your brake system, the first step is to pull all of the old fluid out of the master cylinder reservoir. You can use a syringe to withdraw the old fluid, or perhaps soak it up with a shop rag or towel. Again, be careful not to spill any brake fluid. Once it is clean and dry, make sure all the bleed screws are closed and fill the reservoir with brake fluid. Make sure to close the new brake fluid bottle every time between filling to avoid spills and minimize the amount of water the fluid can absorb from the atmosphere.
2. Attach a fluid catch bottle to the Mini Bleeder hose, and start at the caliper. If you have a two caliper system, it does not matter which one you start with. Connect the Mini Bleeder to the brake caliper bleed screw. Stroke the brake lever a few times, and then hold it to maintain pressure, and open the bleed screw a small amount. You will see the old fluid flow out. After any flow has slowed and the lever has come to the bar (or stop), close the bleed screw, and release the brake lever. Repeat these steps until new fluid flows clearly through the hose. Once one side is flushed and fluid flows clean without any air bubbles, move to the other side if you have two calipers and repeat.
3. If there is a bleed screw at the master cylinder, now is the time to flush a little fluid here to finish the job off. The same procedure applies, and once you see clear and bubble free fluid, it’s good to go. If you do not have a bleed screw at the master cylinder, it is still possible to bleed excess air from the banjo bolt. Wrap the brake line with a rag just below the banjo bolt to catch the fluid that will leak past the bolt. Stroke the lever a few times, and while holding the lever back, loosen the banjo bolt until some fluid and air flows out. Tighten the bolt again before releasing the lever. Again, we cannot stress enough that it is critical that no fluid gets on any painted surfaces. Make sure to clean the area carefully of any residual brake fluid. After doing this once or twice you will understand how beneficial it is to have a bleed screw in this location!
4. During all of these procedures, make sure that the reservoir does not go empty and pull air into the system! If it does, you will have to start over.
5. Take a break and go and get some lunch, or relax with a tasty beverage for a half an hour. This will allow time for any small bubbles that are entrained within the fluid to consolidate. Tapping gently on the caliper and the master cylinder will help dislodge any bubbles that may be trapped. Also, manipulate the brake line, particularly if there is an arc at the top of the line to the master cylinder. A bubble may settle at that high point, so moving the line around to encourage those bubbles towards the bleed screw at the master cylinder will help make the job easier.
6. Go back to the master cylinder, and bleed it a few more times. You should see a few more bubbles come out. Do the same for the caliper and you will be done with your bleeding. If you want to be really thorough, a quick re-bleed the next day may catch another bubble or two.
7. When you are done, be sure to check the fill of the master cylinder, and top it up to the “Full” line if needed. Never overfill the reservoir. If the fluid has no room to expand to when it gets hot, it will start to push the pistons out of the caliper, causing drag, and in extreme cases, brake lockup.
These procedures will result in a top performing brake system, that will provide you with a long service life, and exceptional feel and stopping power.