Tech Tip: Wheel Bearing Remover Set
At Motion Pro, we make innovative tools and products that help you maintain and repair your motorcycle, ATV or UTV. Regular maintenance on your ride will keep your components performing correctly and give you, the rider, peace of mind before your next adventure. In this article, we’re going to explore use of our popular Wheel Bearing Remover Set, intended for removing the wheel bearings in motorcycle hub’s.
Maintenance and inspection of your motorcycle’s wheels can help prevent unnecessary wear on your components, eliminate failures, and ensure consistency in control and feeling when riding. A critical component to the wheel and hub is the internal sealed wheel bearings. They are crucial for a smooth and precise feel of the wheel when in motion. Even though sealed, the bearings can still fail from moisture and many hours of abuse. Old or worn out bearings will feel notchy, rough, or in severe cases, wobble, when pulling and pushing along the outside diameter of the motorcycle wheel. In most scenarios, irregular movement will be felt through the controls when riding. A motorcycle’s front end can feel loose when in contact with the ground, or wobbly when maneuvering turns/obstacles. In this case, your wheel bearing should be inspected for replacement. Below, we show several examples of wheel bearing replacements we’ve performed in recent, using the Motion Pro Wheel Bearing Remover Set.
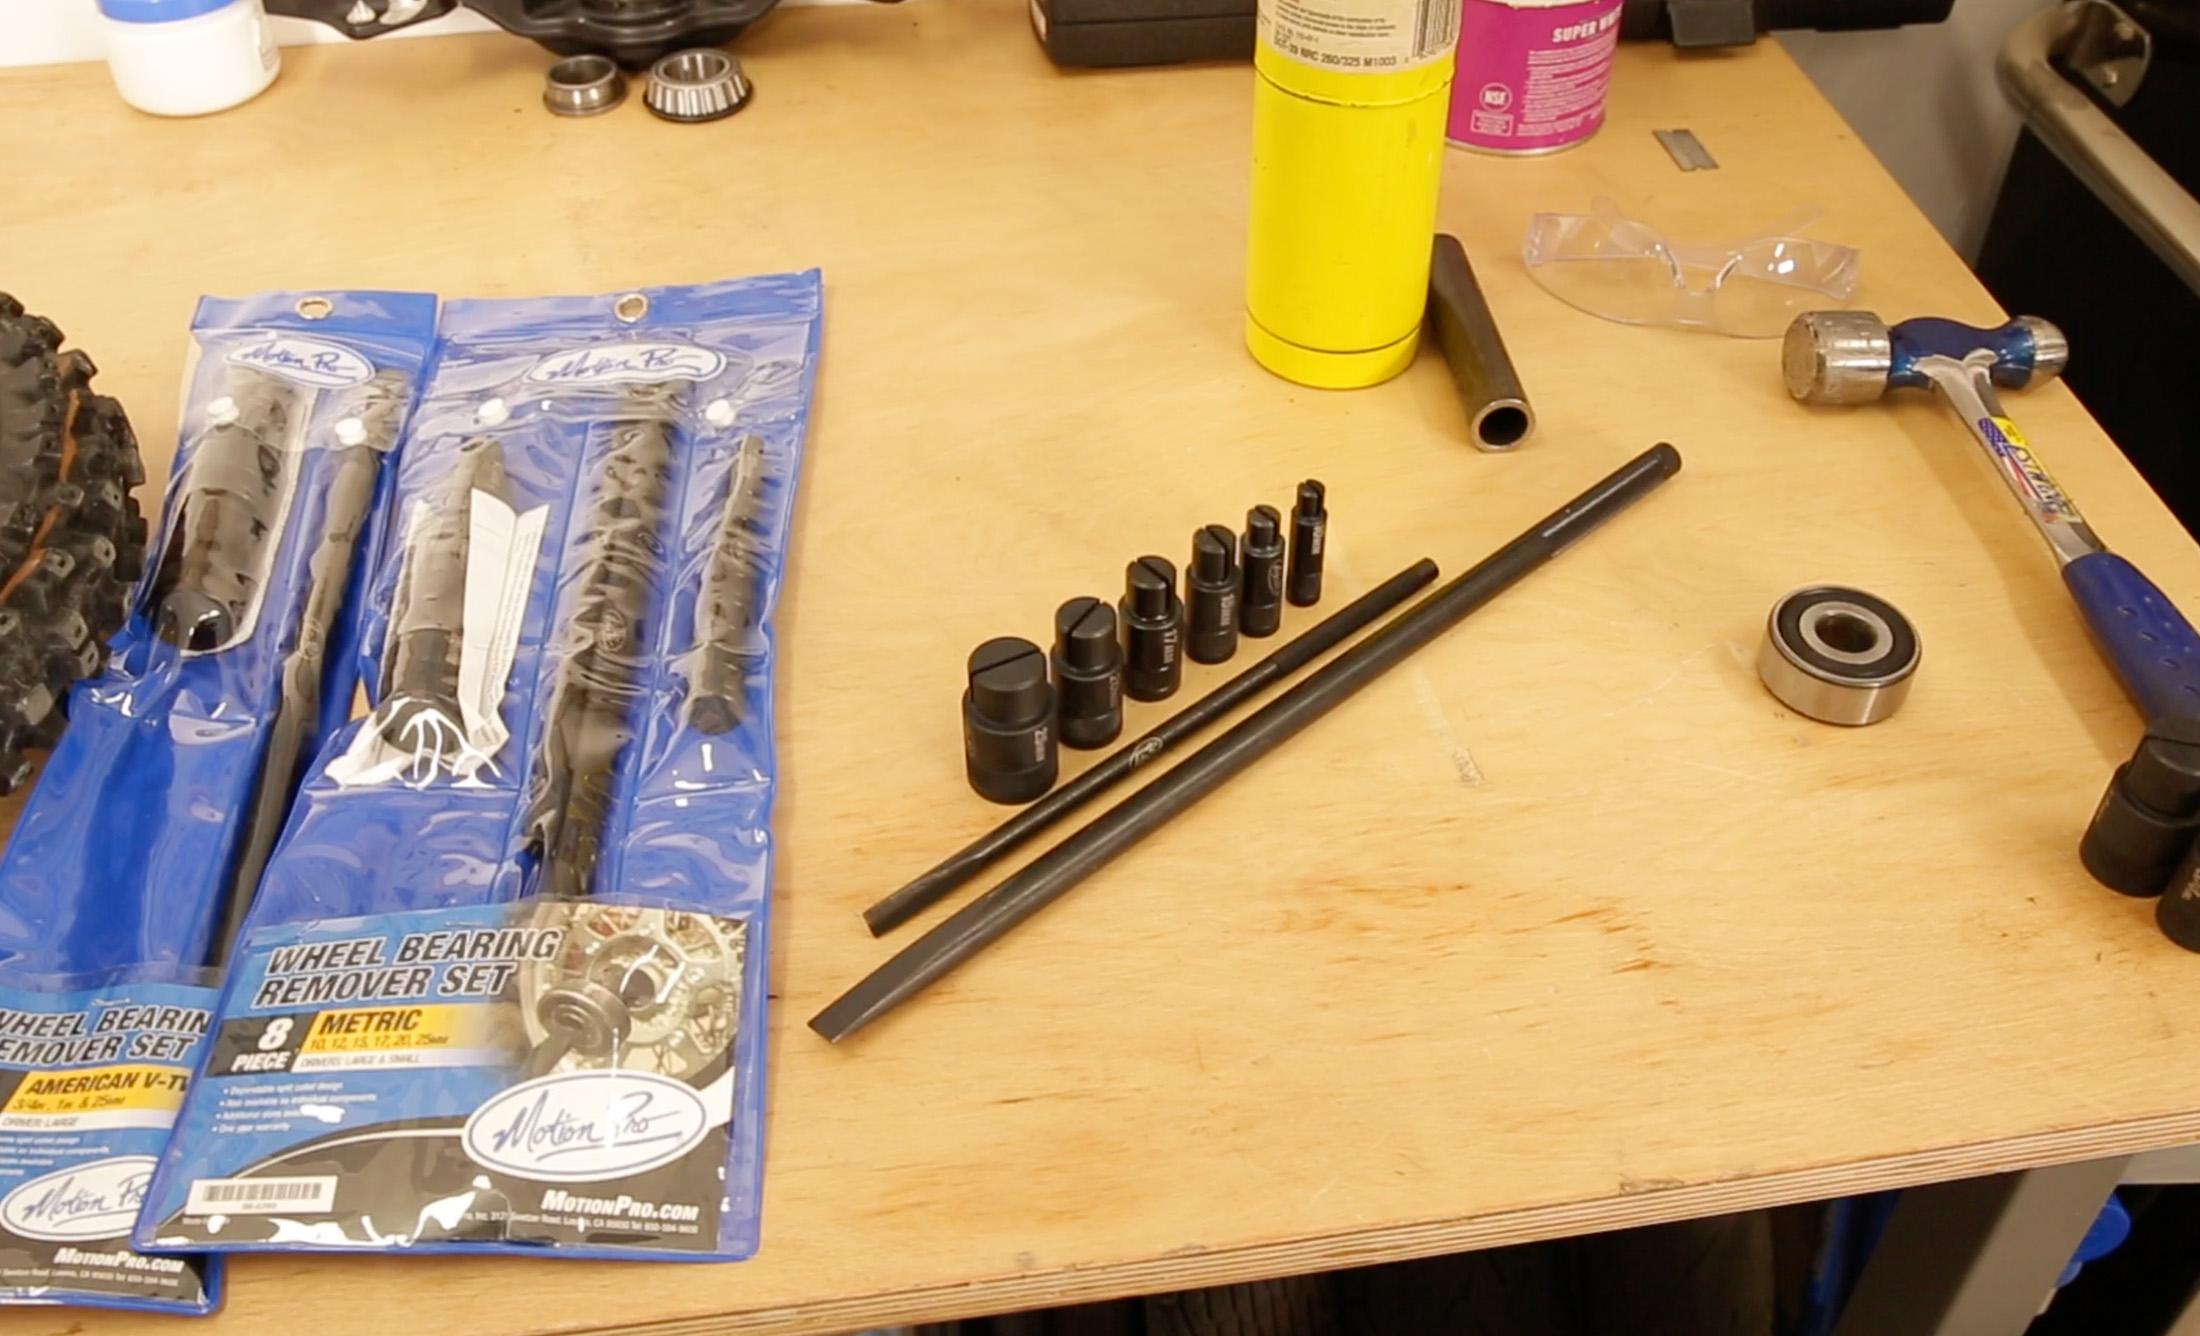
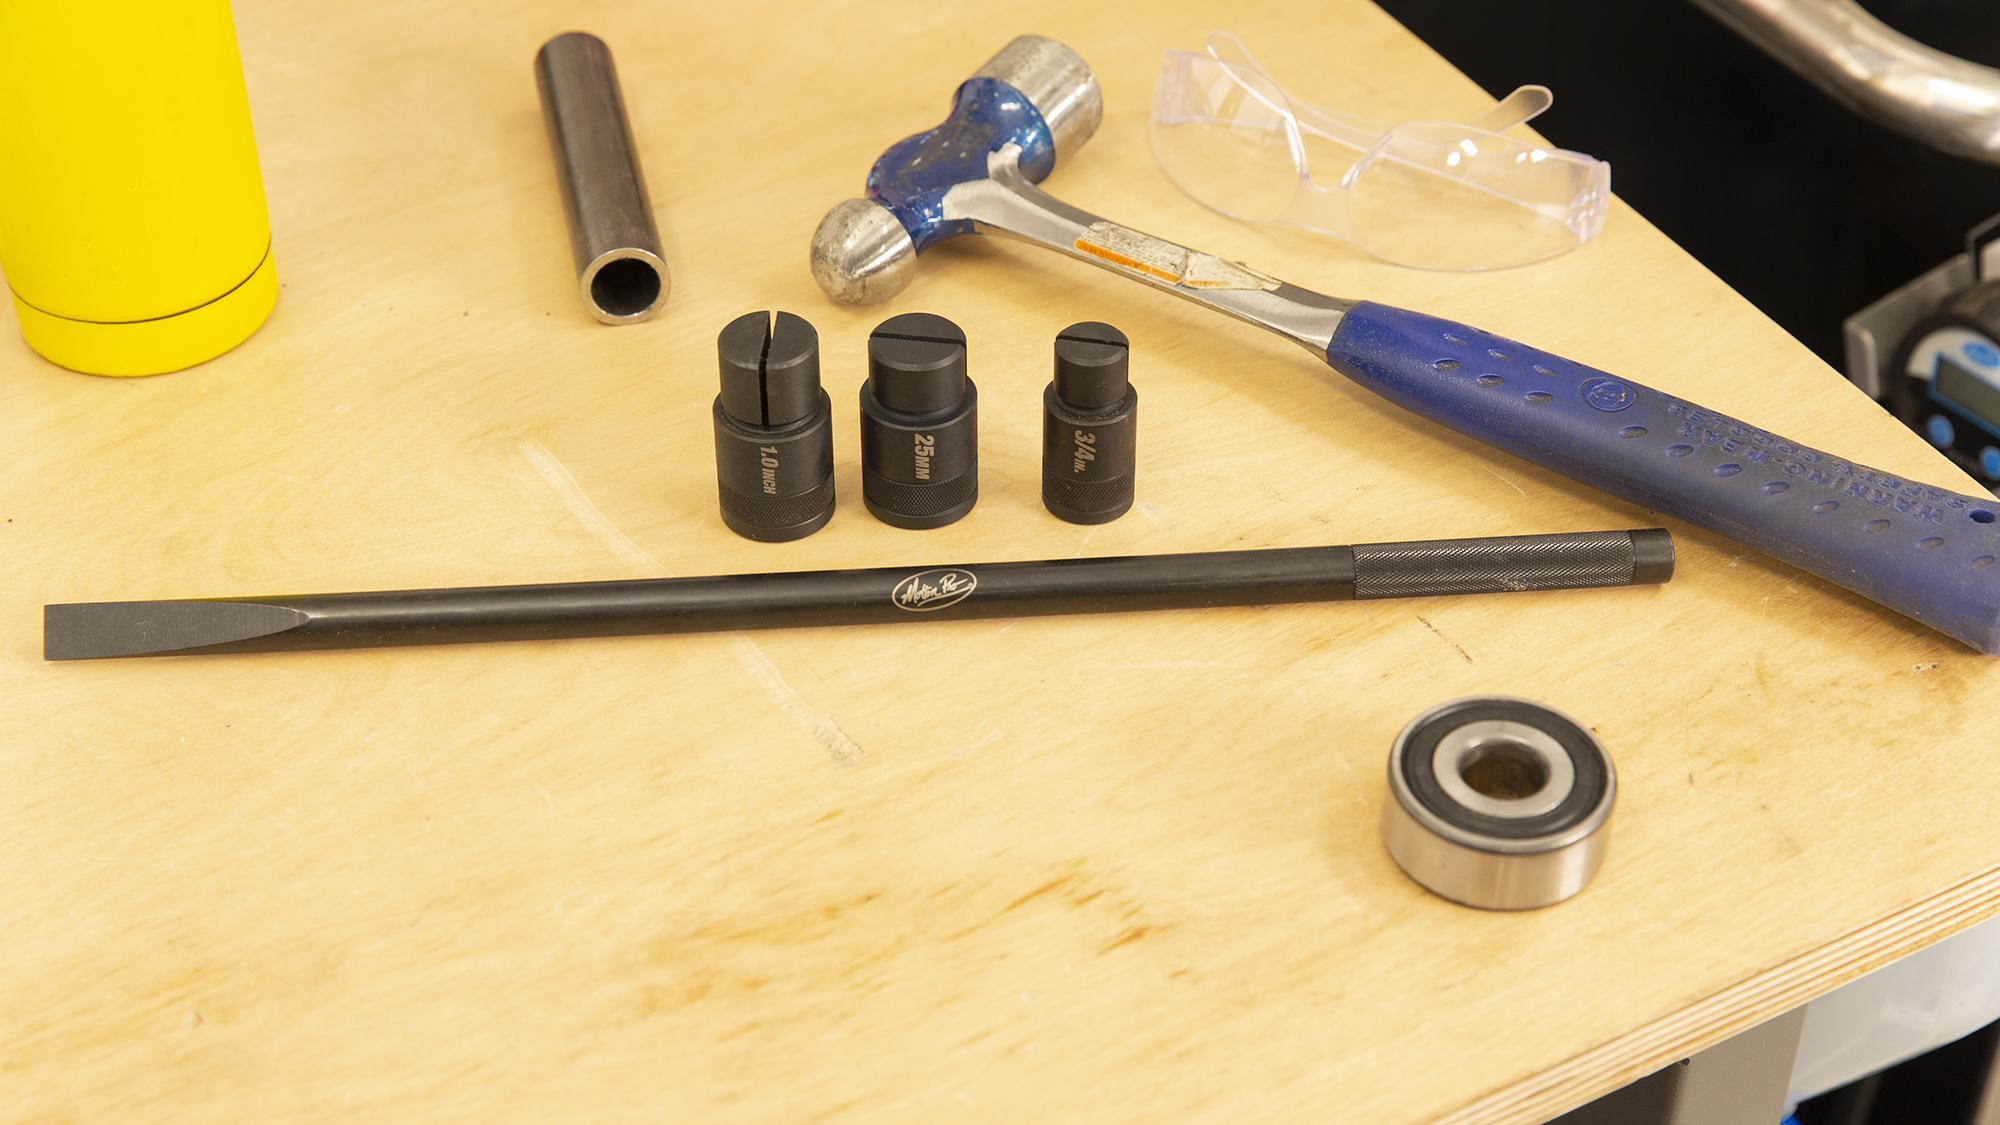
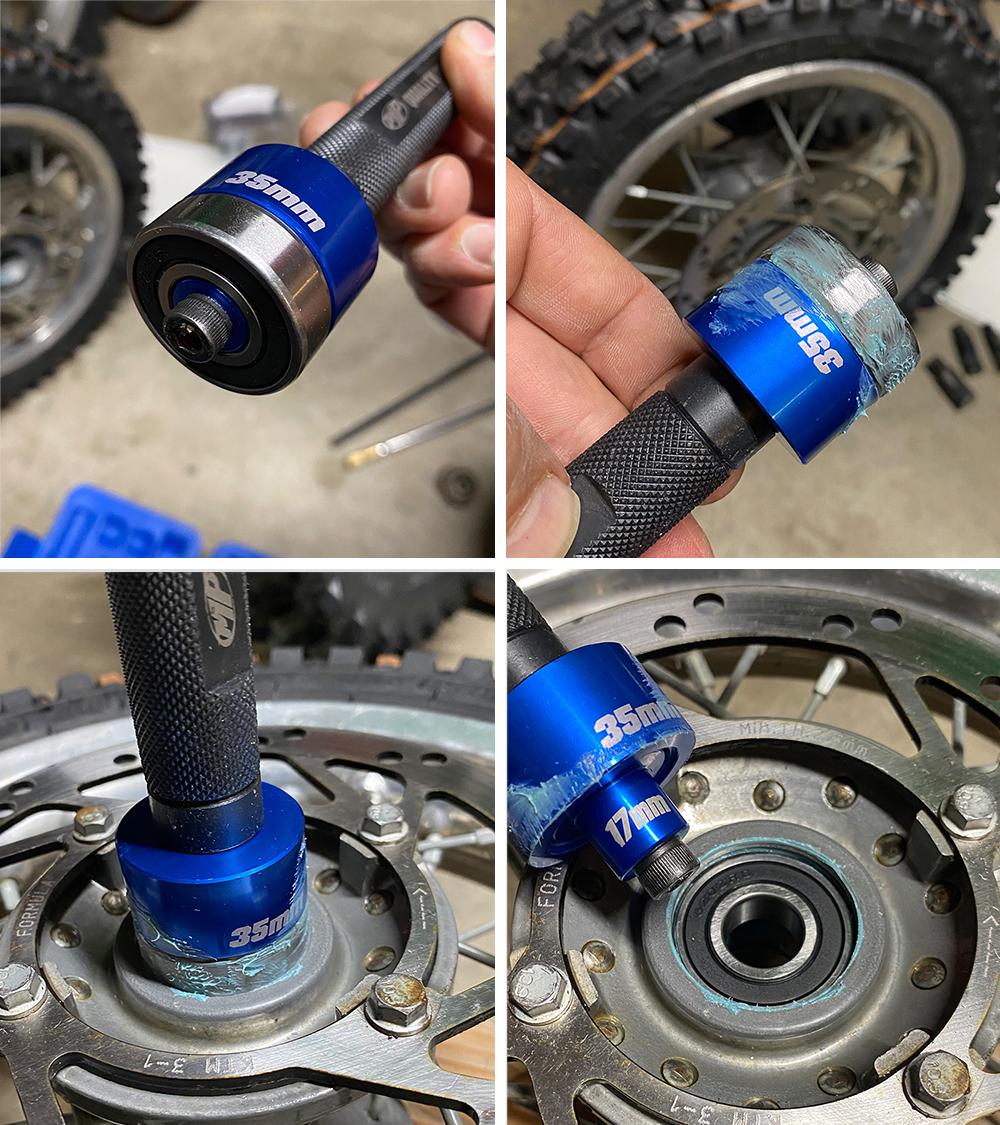
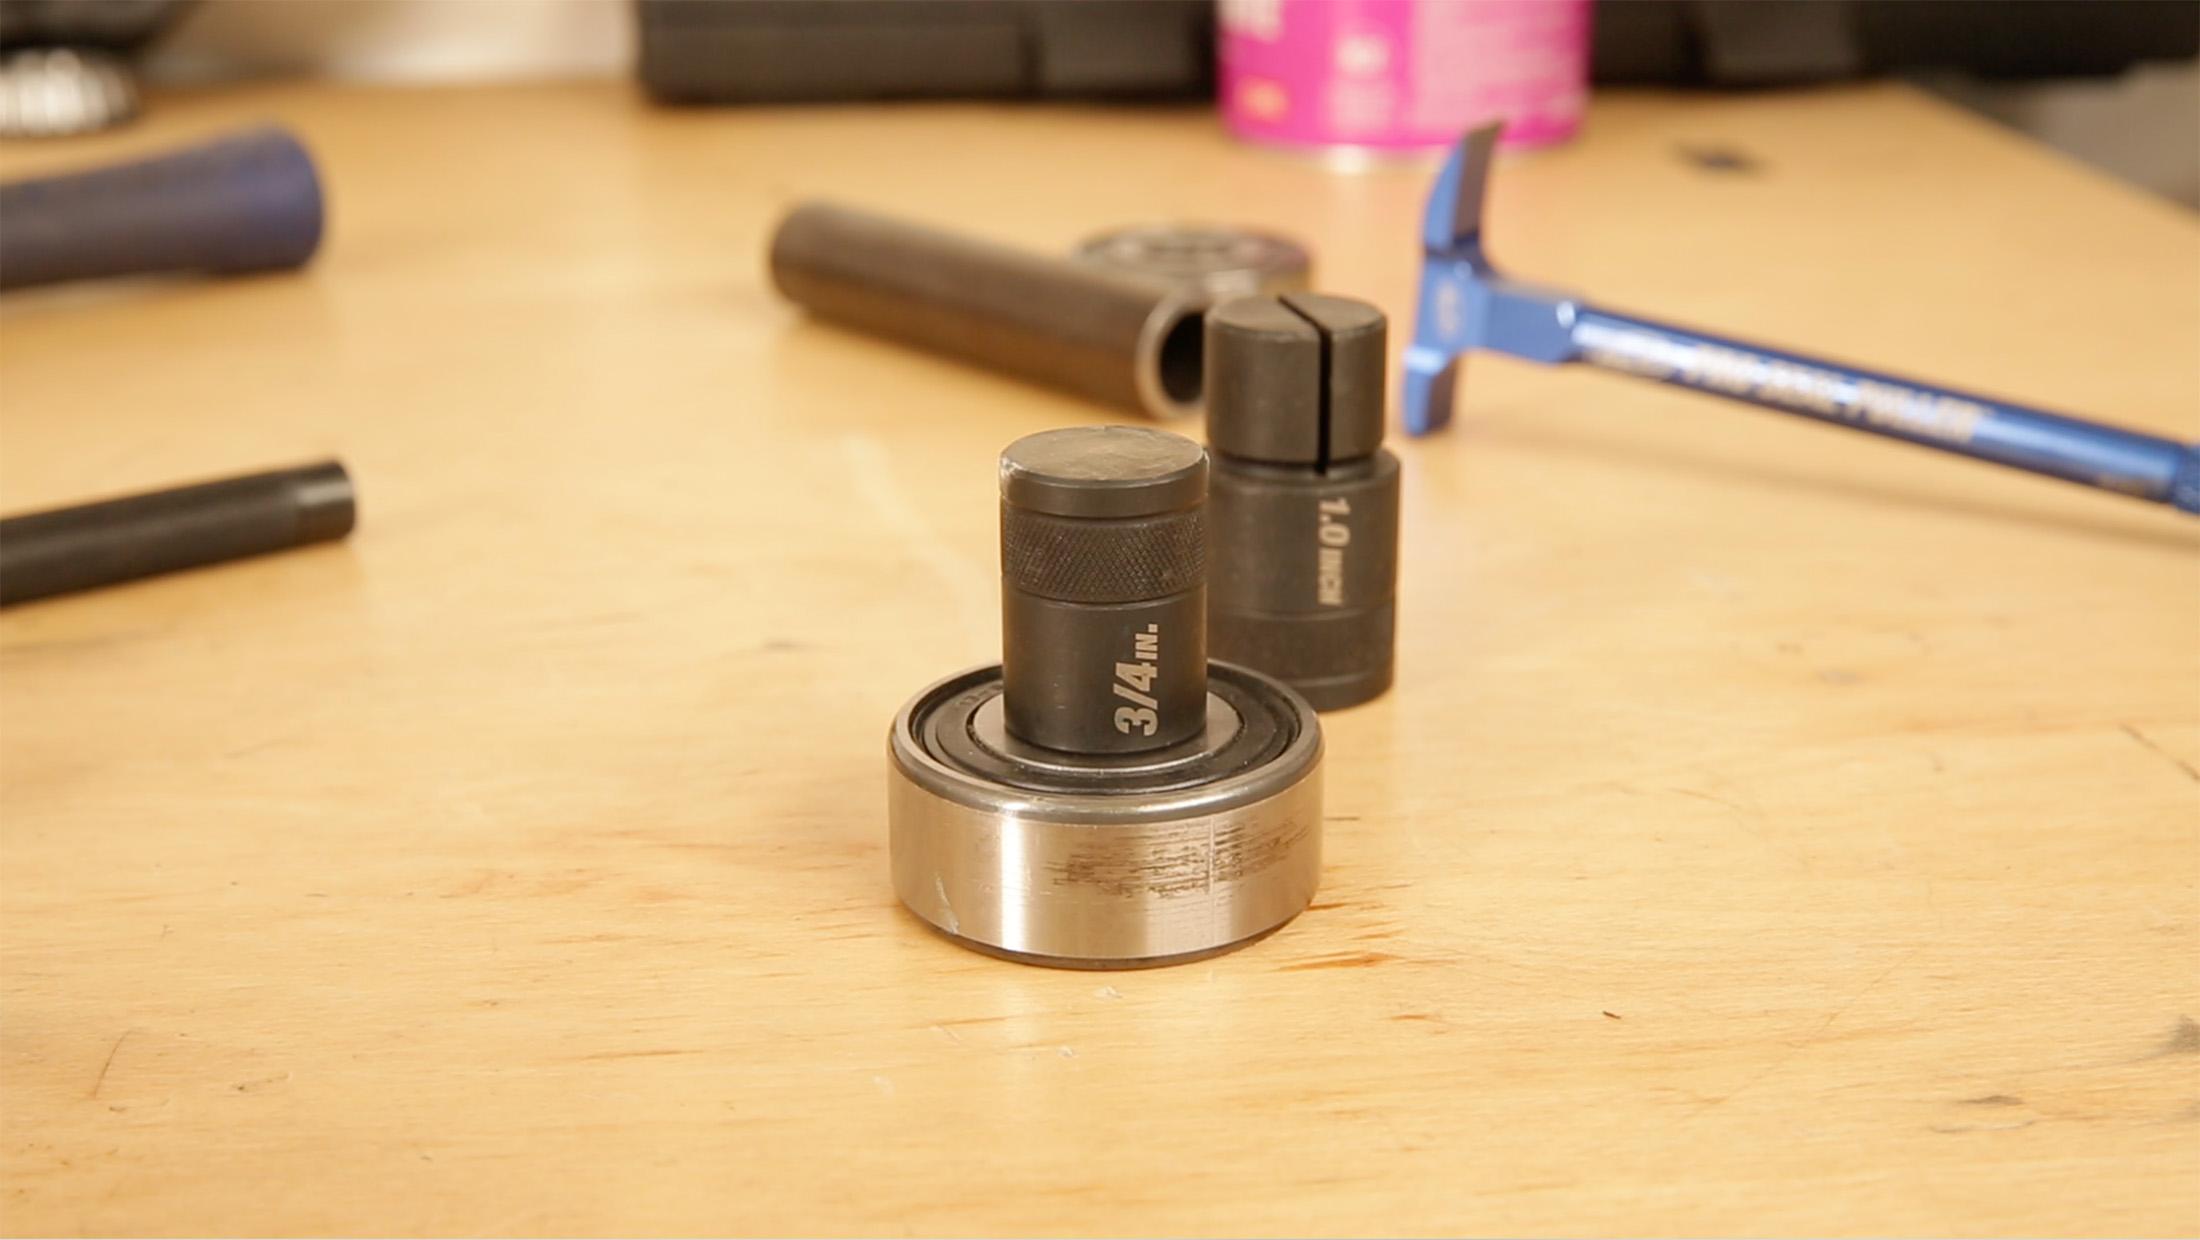
With the Motion Pro Wheel Bearing Remover Set, a main driver, and split collets are used for removal. The driver is used to install a properly sized split collet into the inner diameter of a wheel bearing. Once driven in place and firmly positioned in the collet. You can then proceed to drive out the wheel bearing. Seems pretty straight-forward, but proper setup and use of this tool will help make this task easy and painless. NOTE: Carefully review the product instructions and warnings included when performing this job. The product includes easy-to-read, guided instructions for each step. Additionally, protective glasses and gloves are recommended for safety when striking the driver. Below, we cover general use of the tool:
1. Getting Started
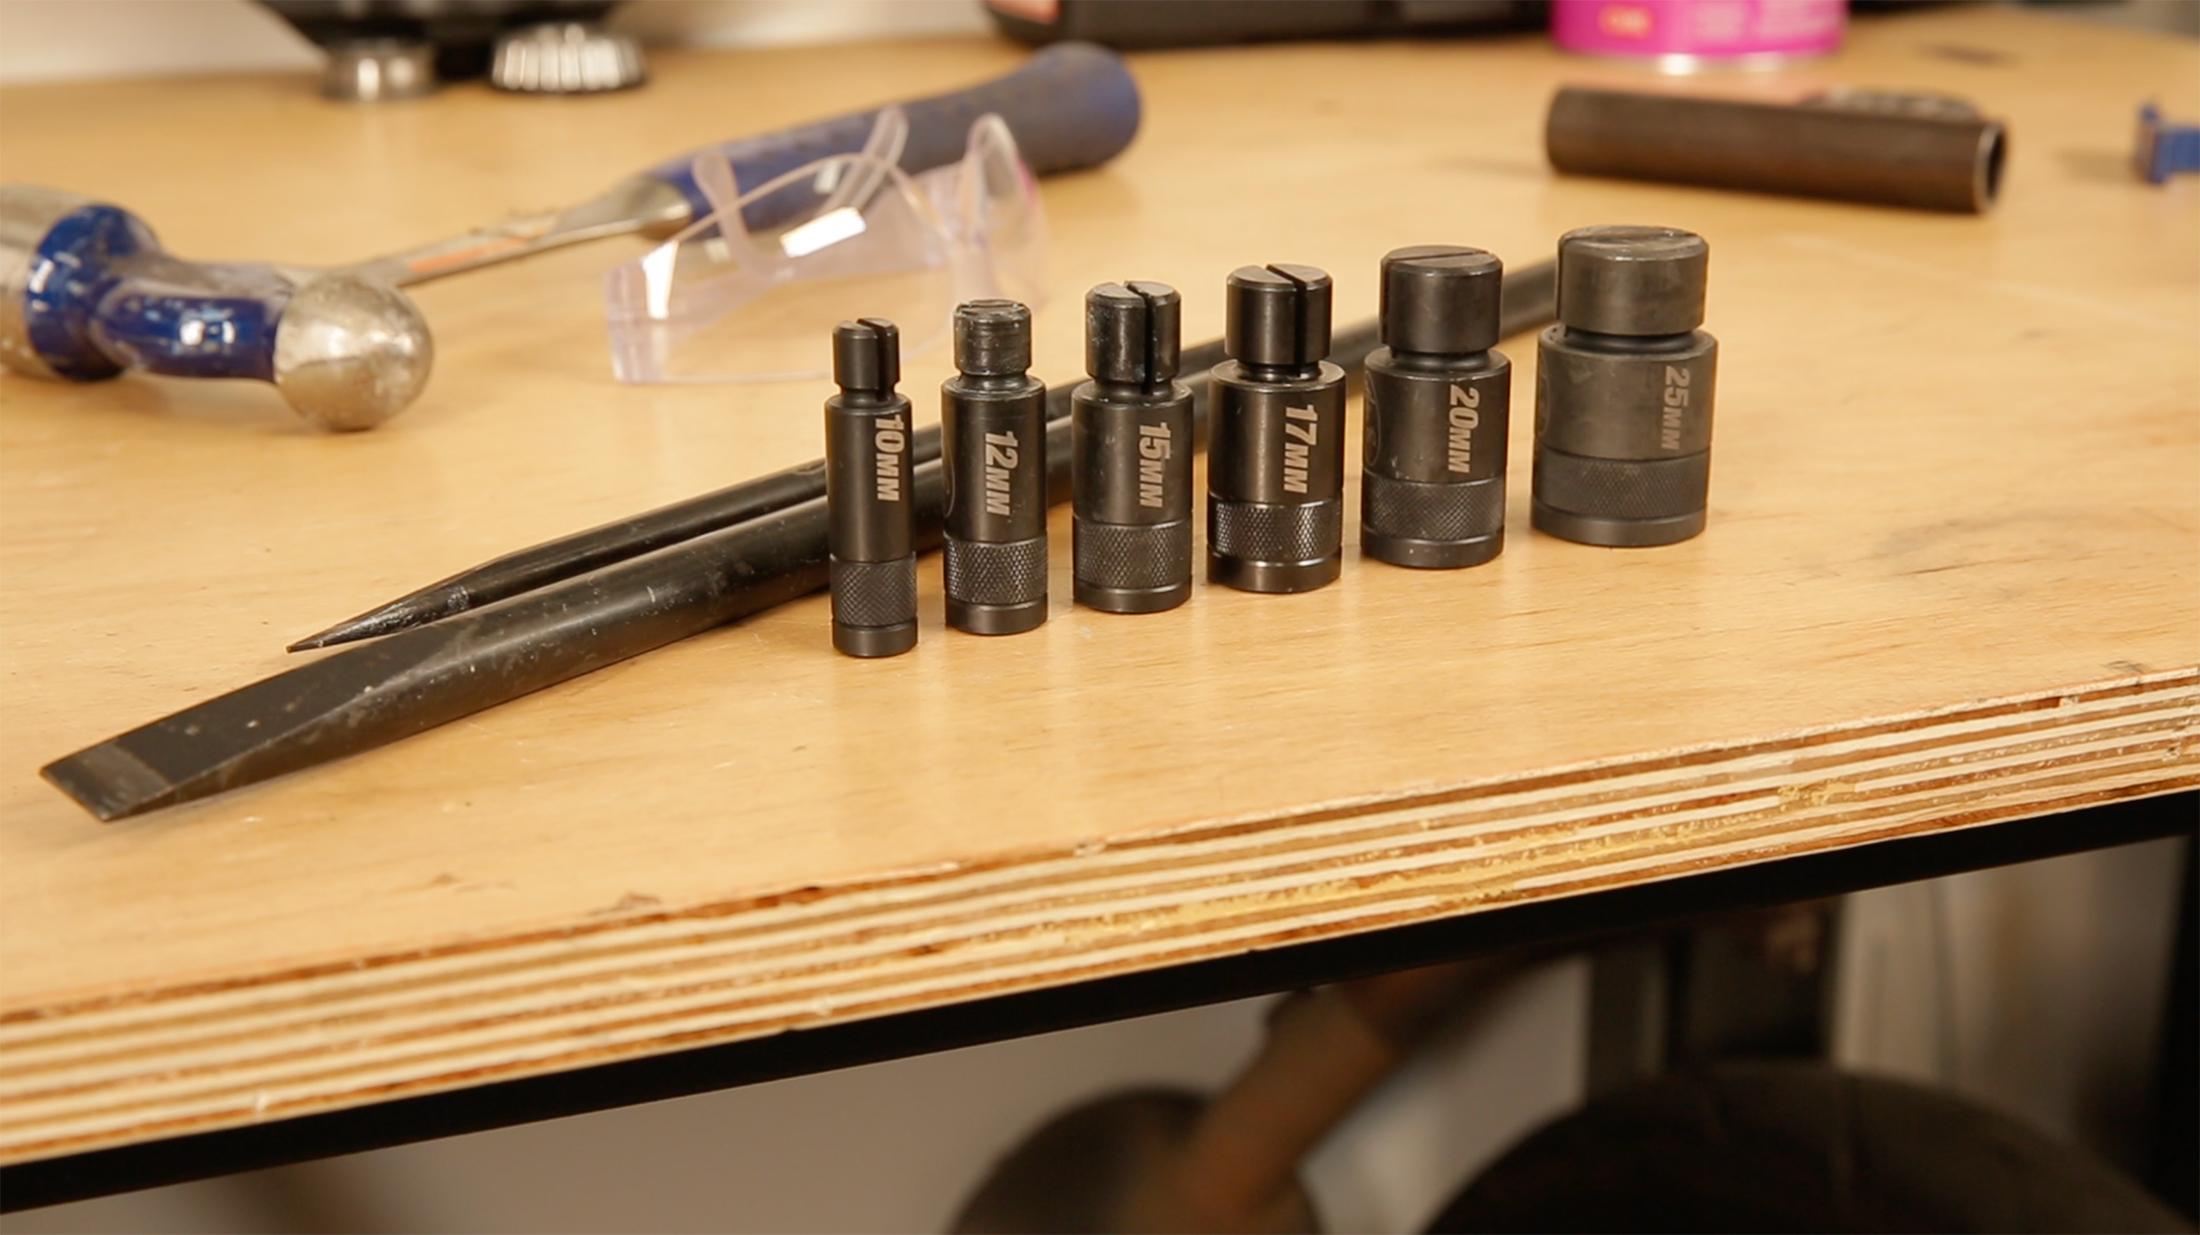
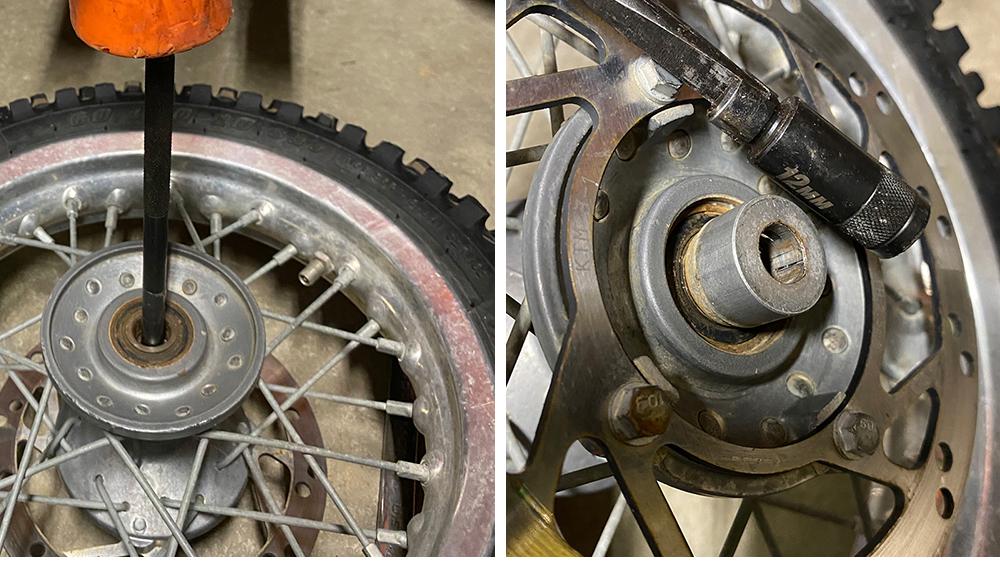
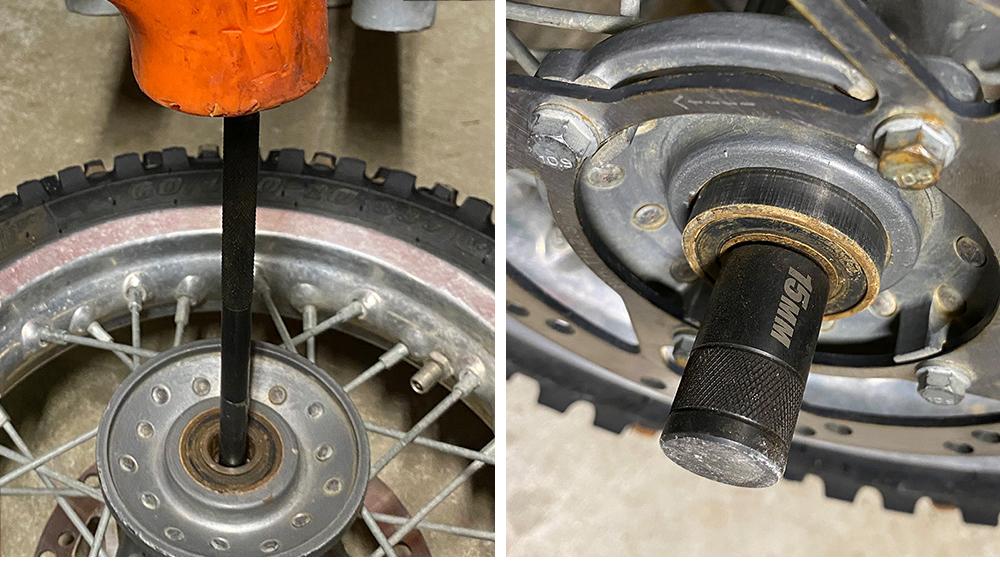
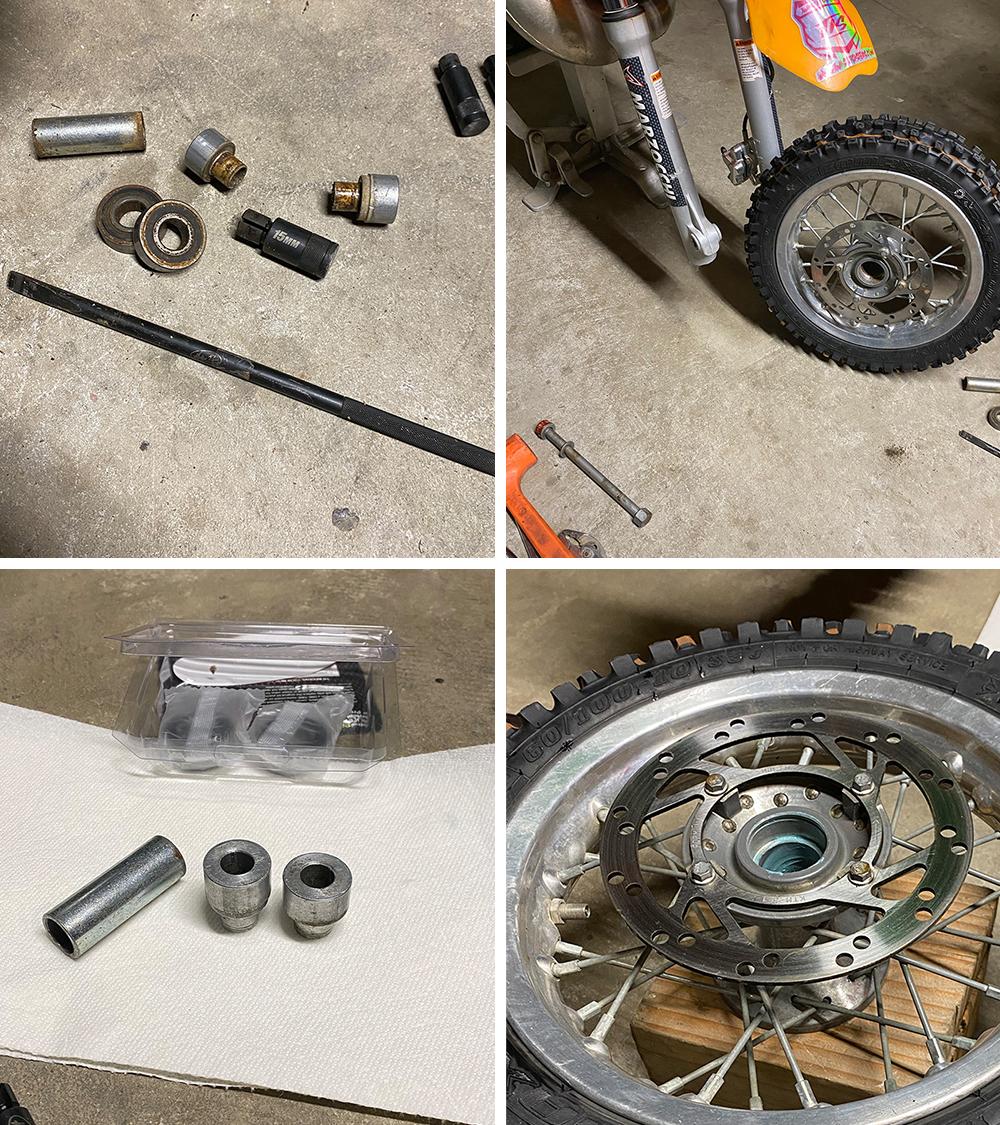
Select the correct split collet to match the internal wheel bearing diameter. The split collets included in our 08-0269 kit, cover general sizes found on most metric applications. For American V-twin/SAE sizes, we offer our 08-0410 kit. In this example, the KTM mini bike wheel started with a challenge. The stock axle wheel spacers in the wheel were corroded and stuck in place. Removal of these spacers quickly became a pain. The internal hub axle guide for the mini bike wheel meets flush with the internal bore of the wheel spacers, therefore there was no surface or edge to use a drift punch to push them out. Luckily, we found our metric kit includes a smaller 12 mm size metric split collet, which fit for our wheel spacers. Removal without the collet in this case, can easily introduce the use of crude tools for removal.
2. Wheel Spacer Removal
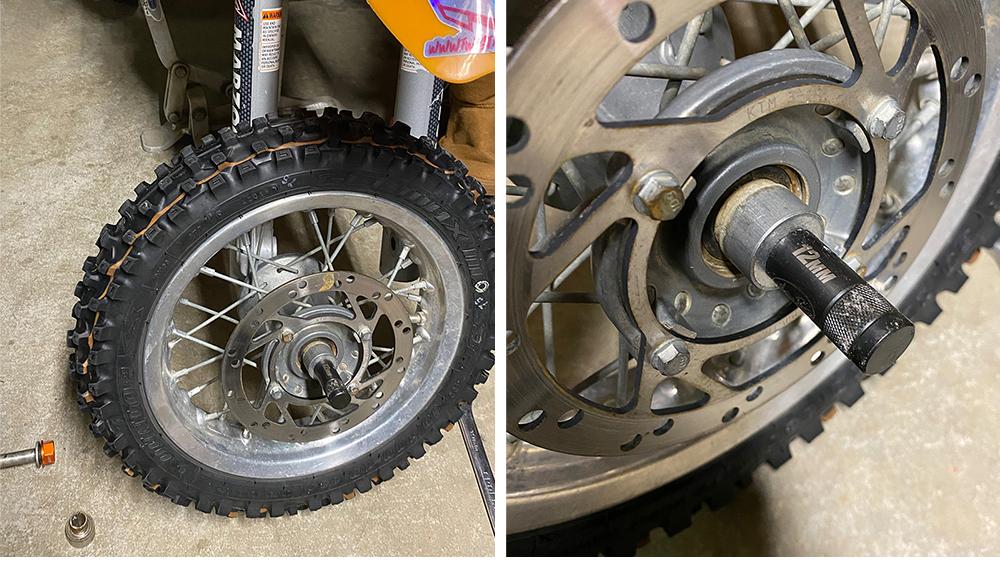
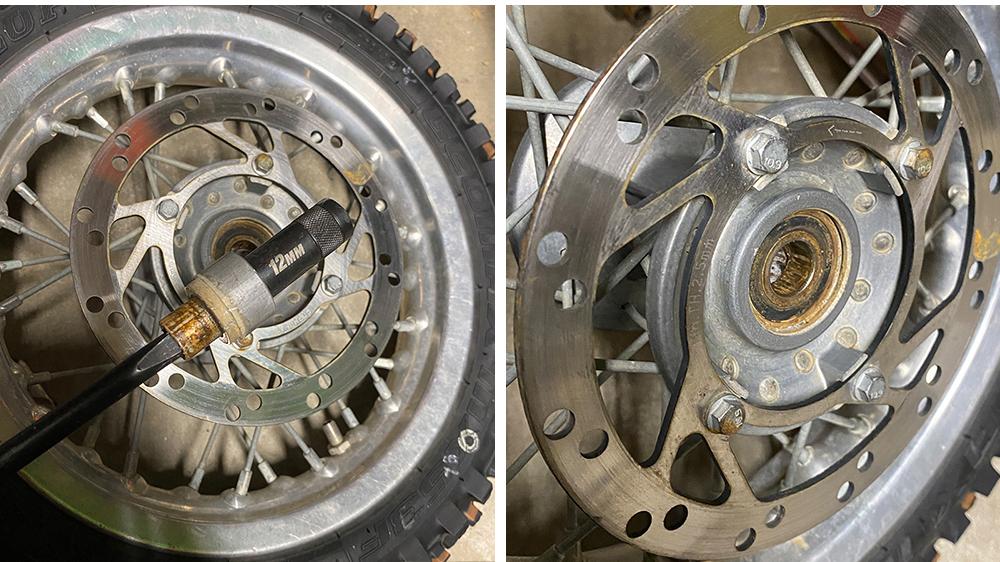
Above, we slipped the 12 mm split collet into the wheel spacer bore, selected our smaller sized driver in the 08-0269 kit, this was determined by the smaller axle size found on the mini bike wheel.
The small driver was then seated into the split collet as shown with a shop hammer (dead blow hammer not recommended,) then wooden blocks were used to raise the wheel off the ground to allow the driver to push out the wheel spacer. With little effort, we easily drove out the wheel spacers without damage.
3. Removal of the wheel bearings
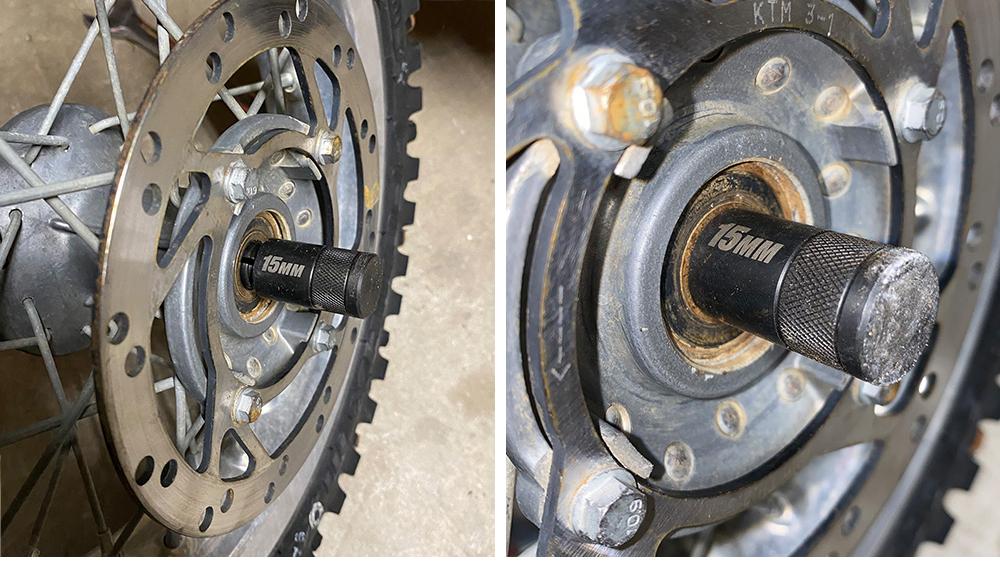
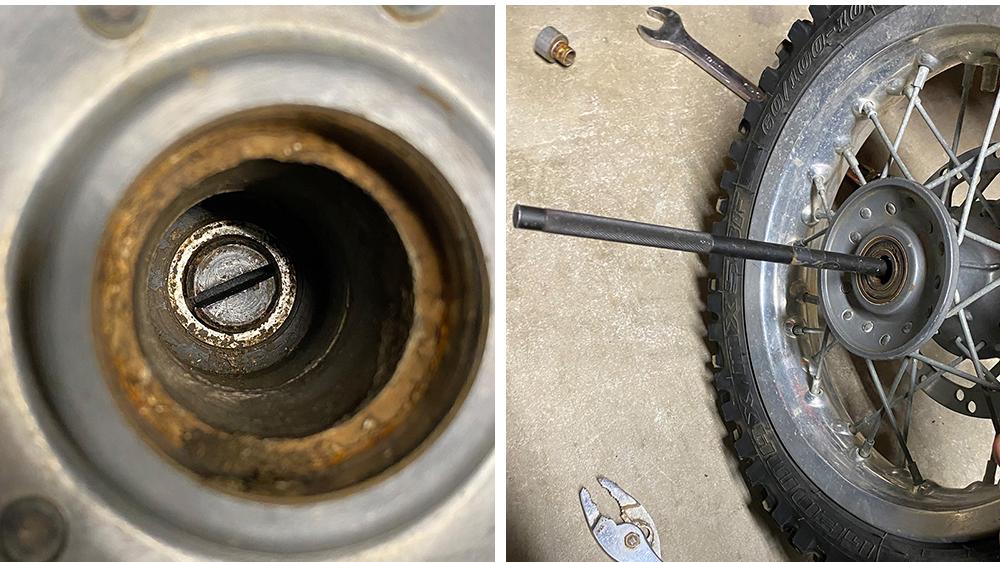
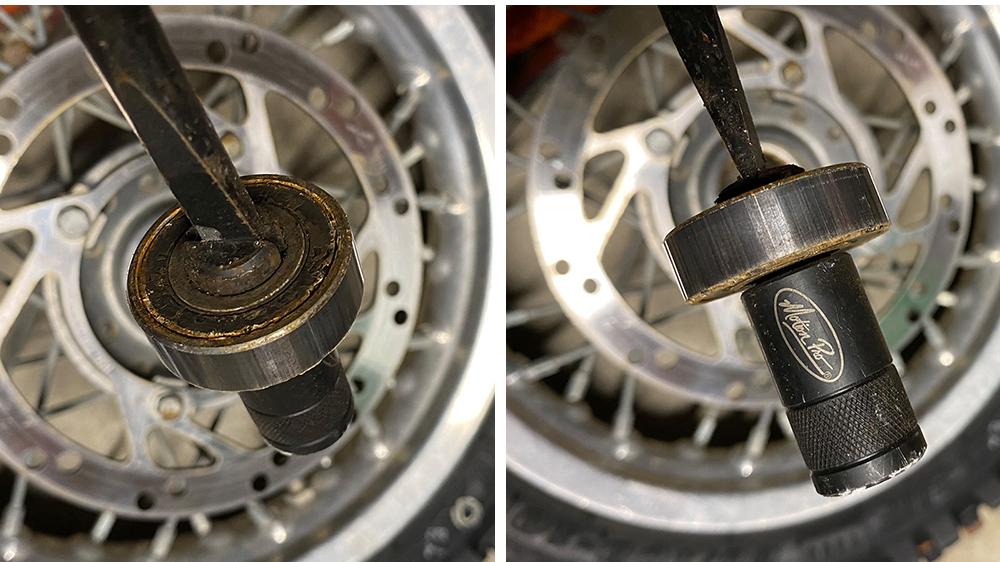
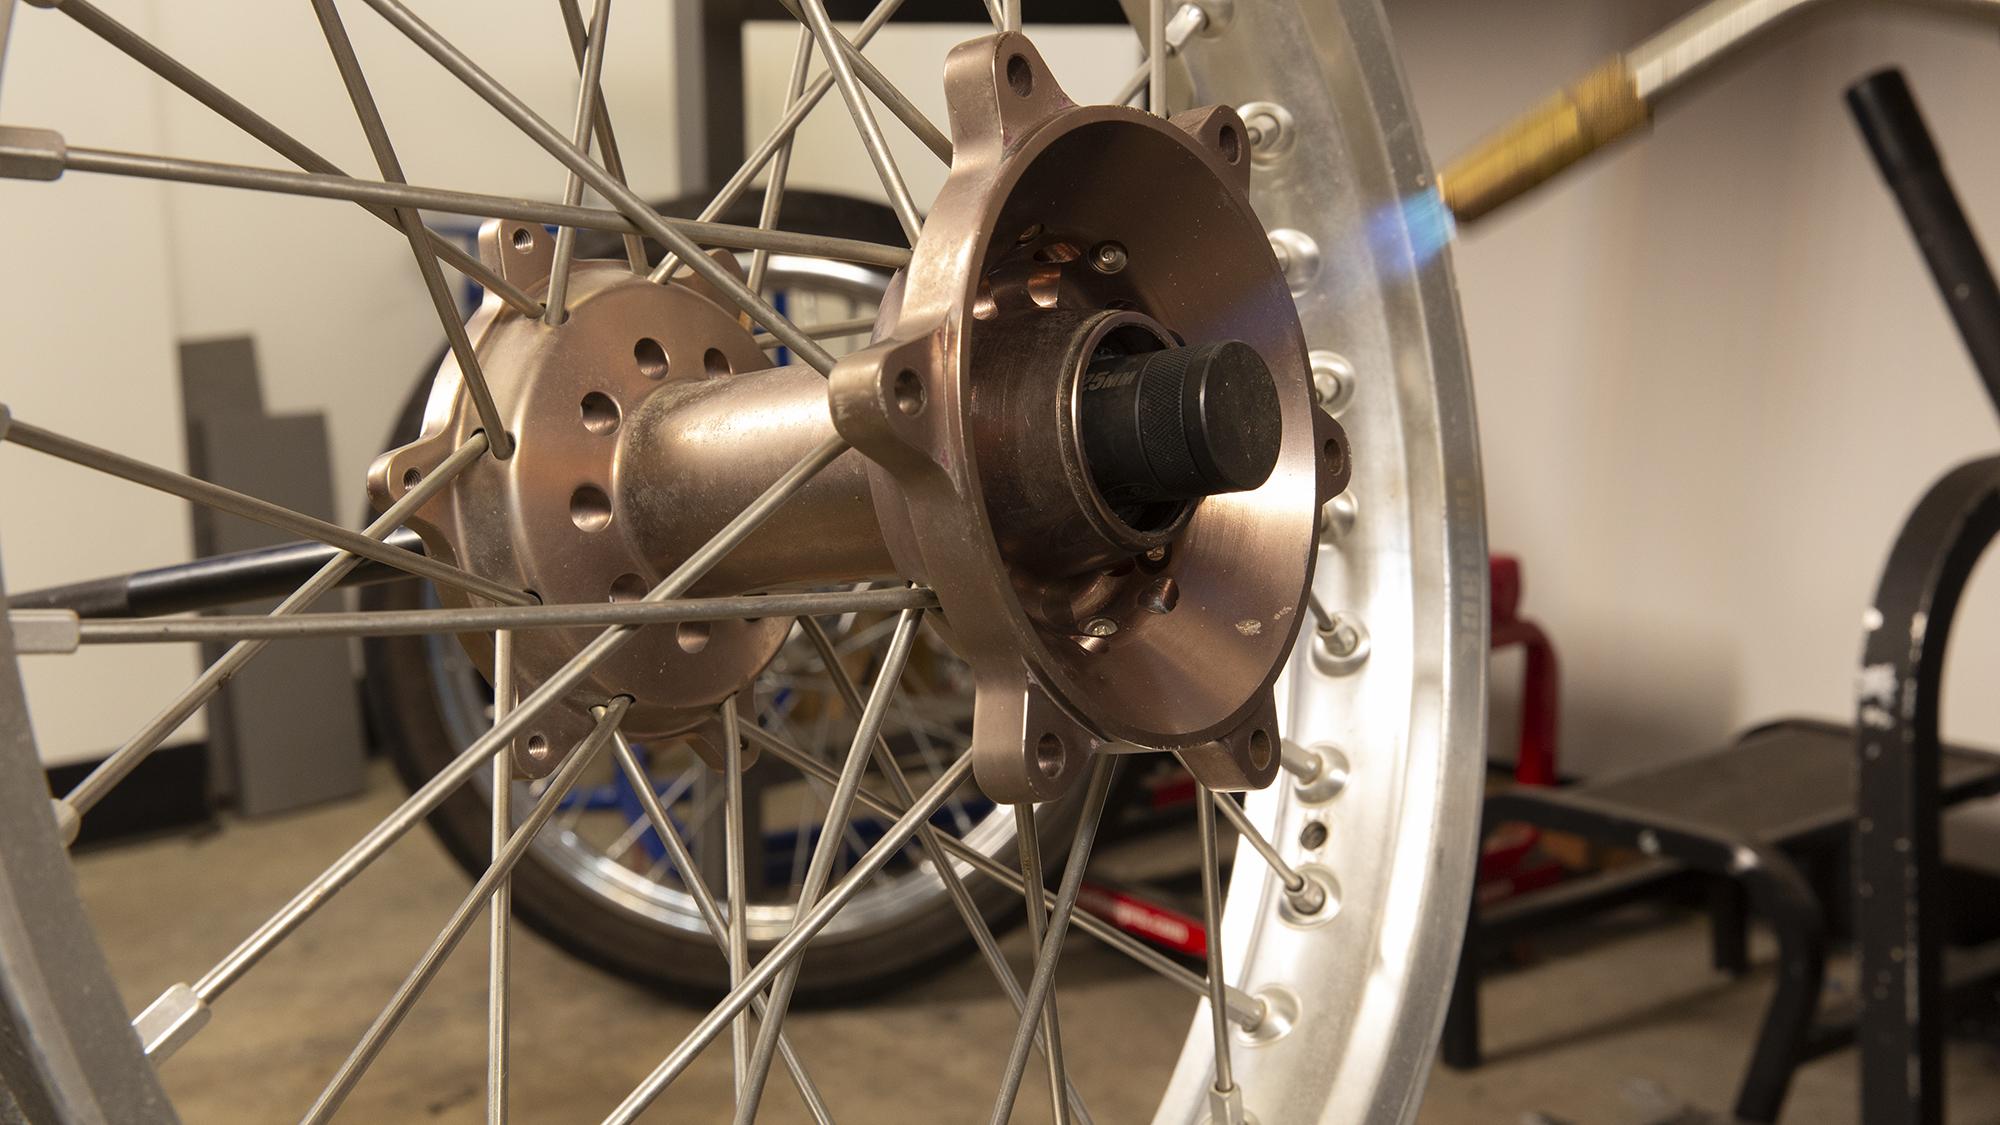
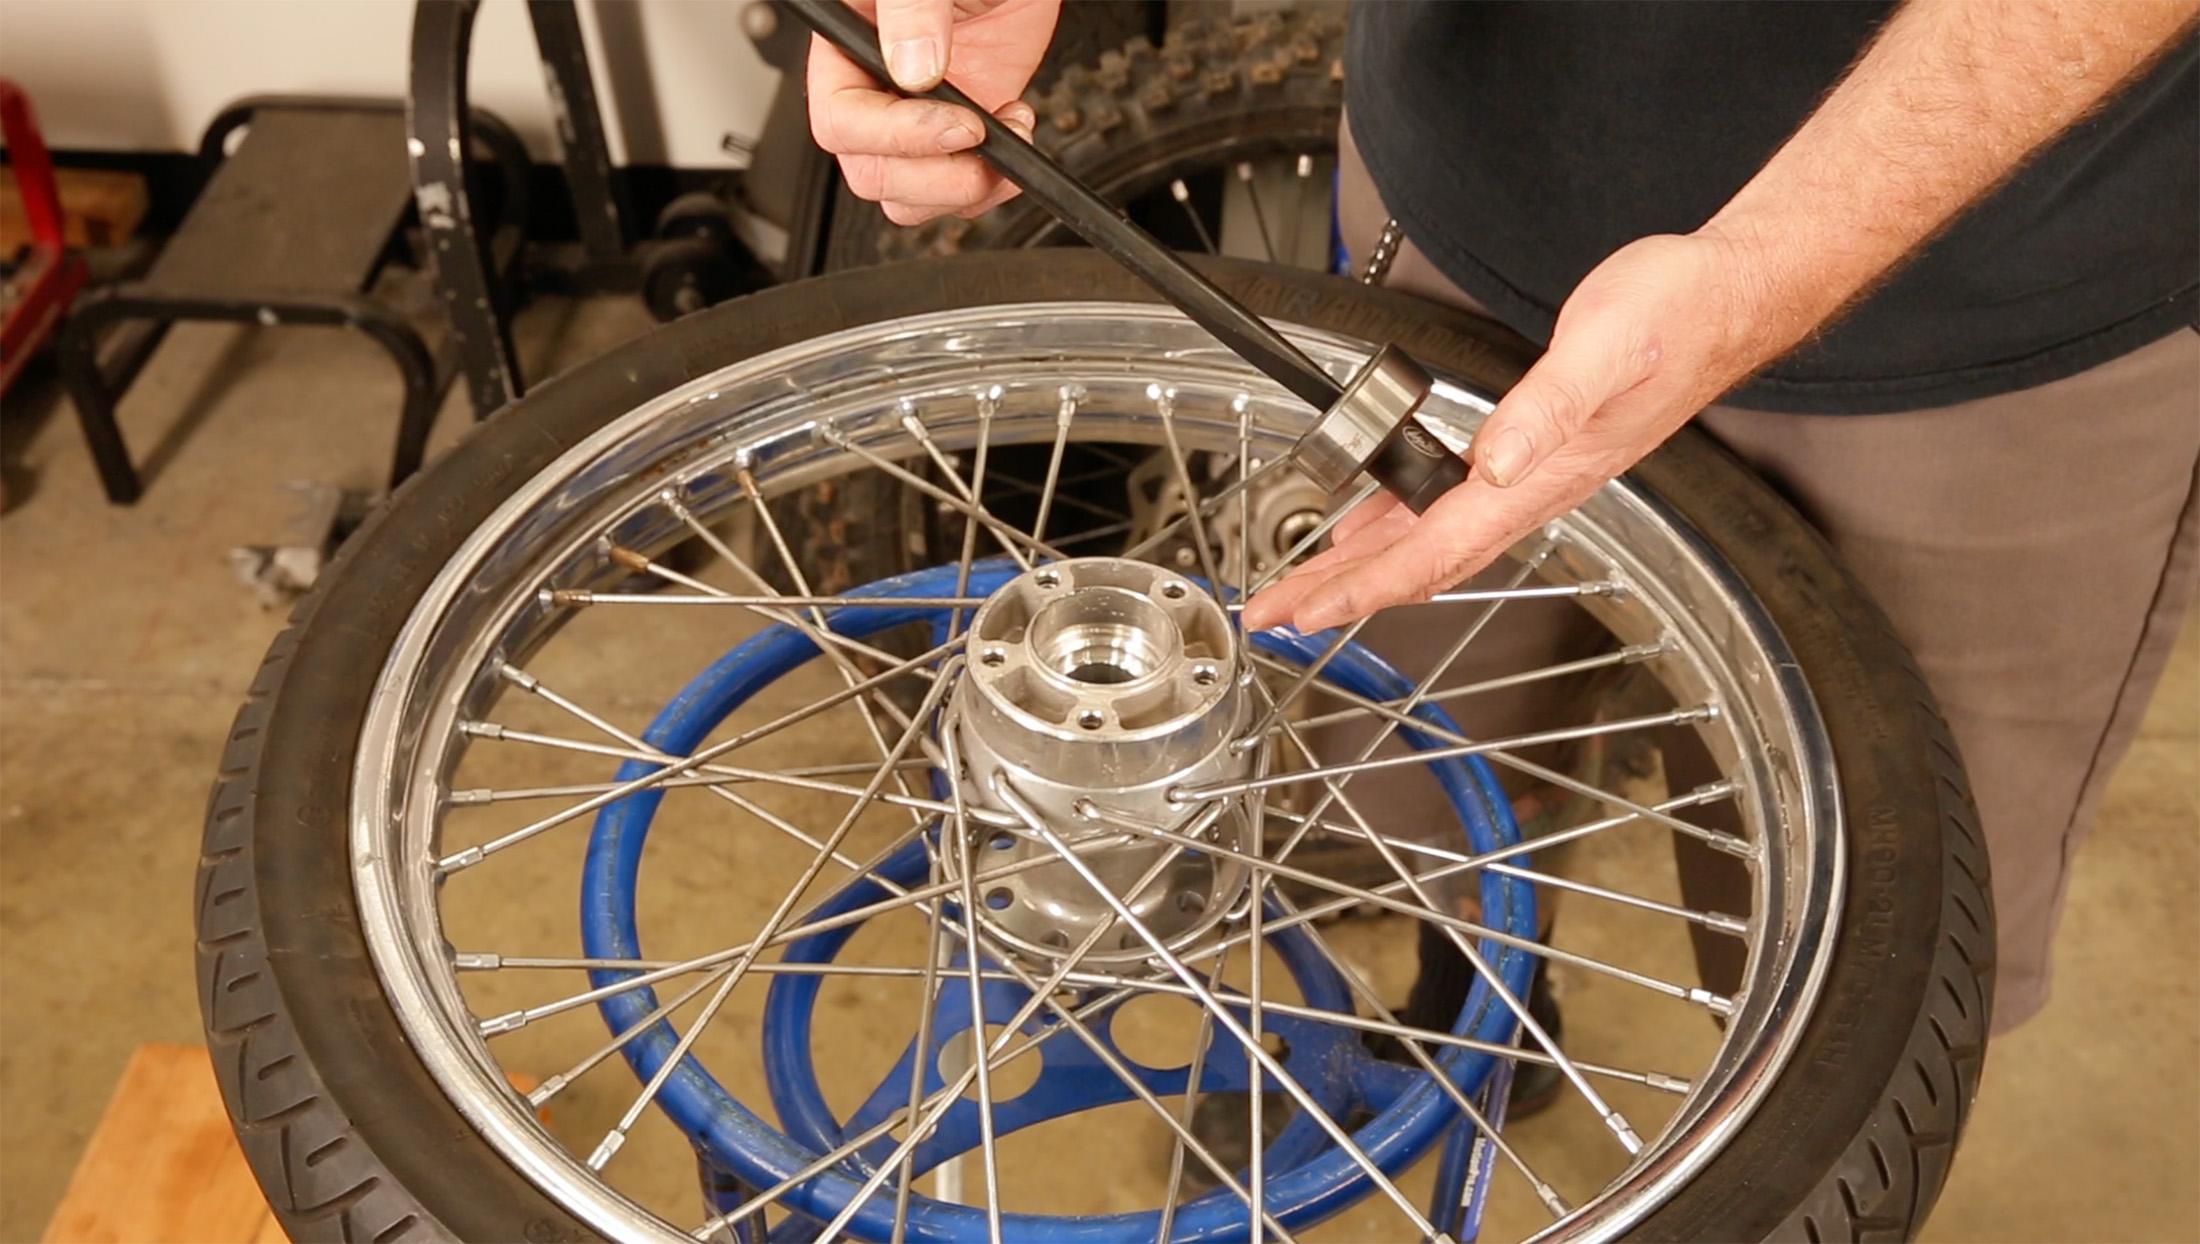
Now that we removed the wheel spacers, we found our main issue, moisture and debris had found its way into and behind the sealed bearings. Note: For severe cases of corrosion in or around the wheel bearings, MAPP gas or heat may be used to expand and free up the bond between the hub and bearing. WARNING: Exercise caution when using heat, perform at your own risk. The 15mm split collet size matched with our inner wheel bearing diameter.
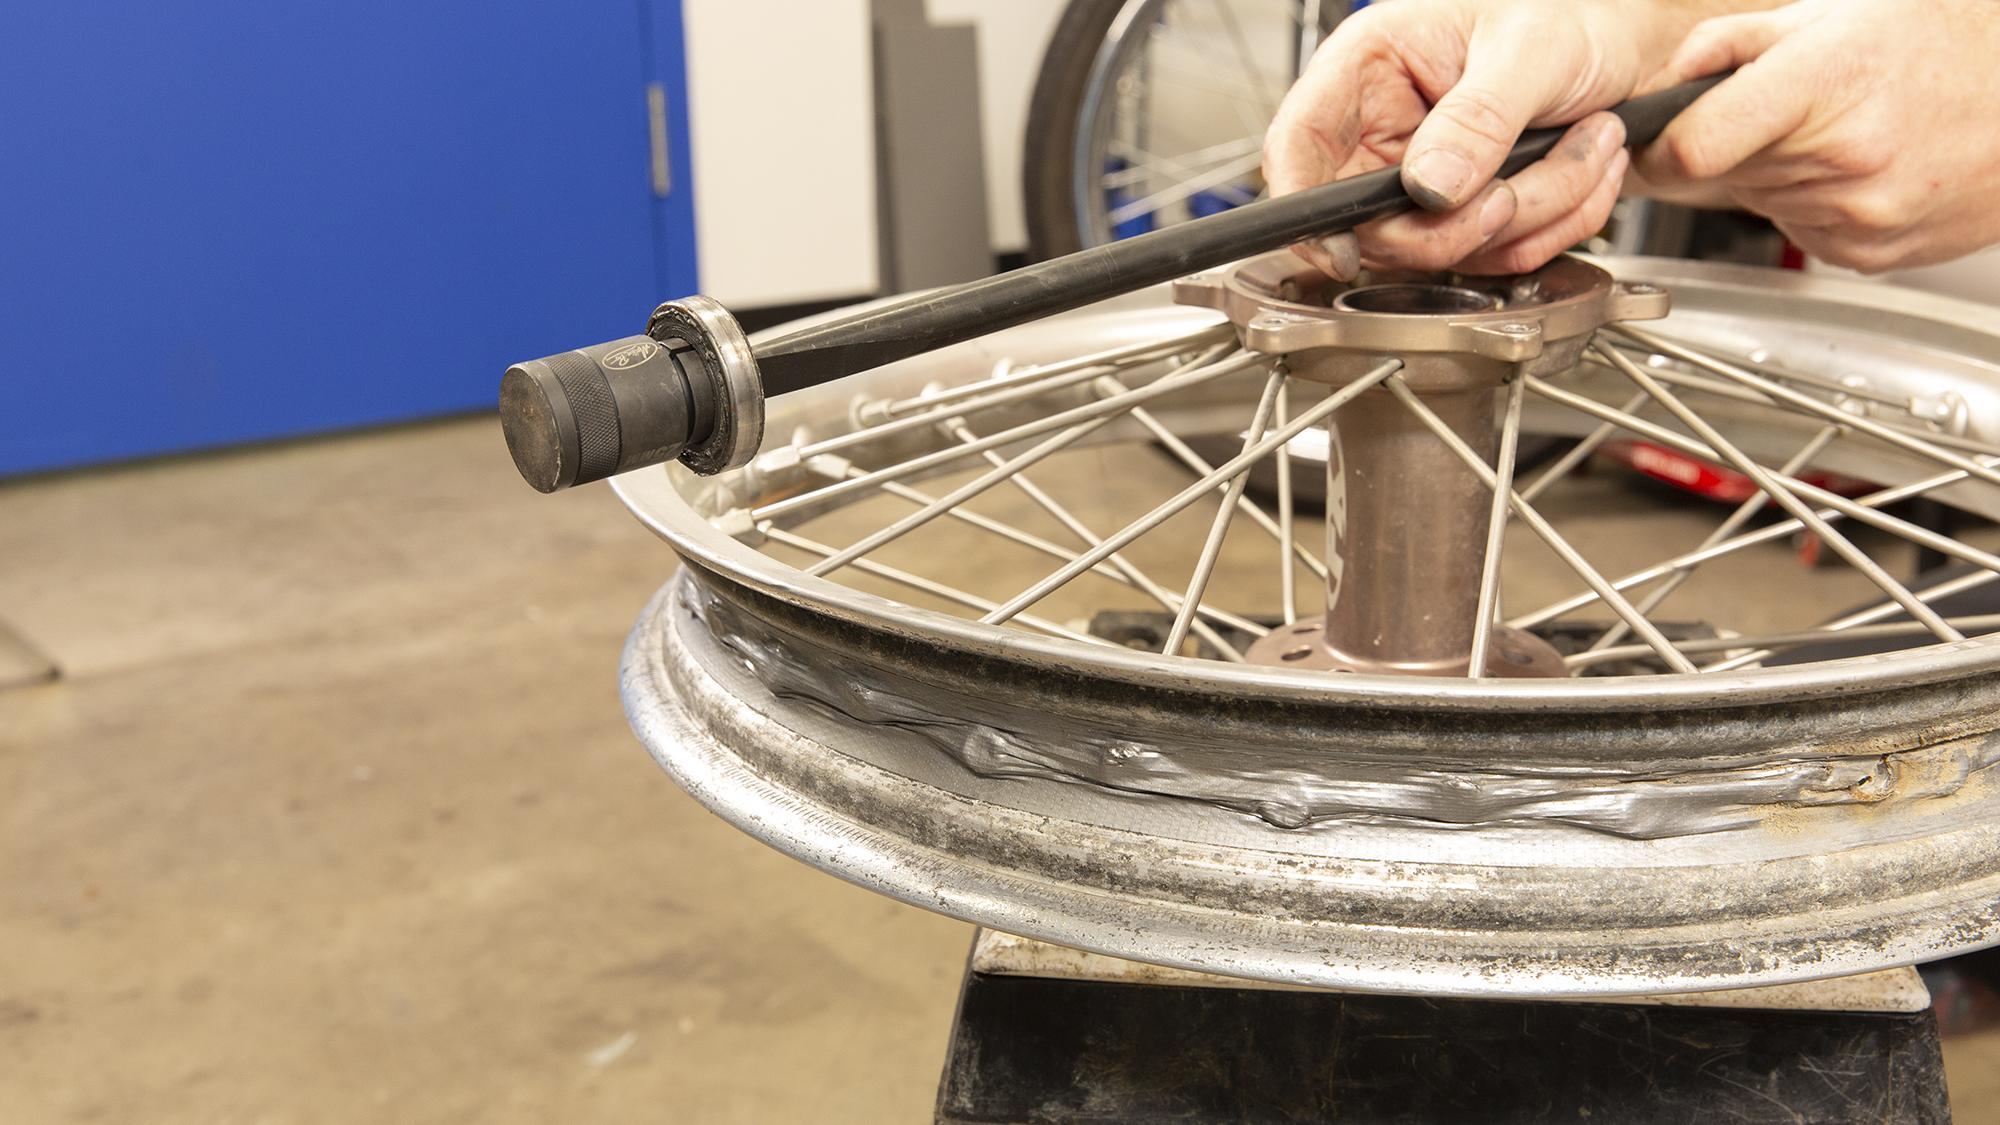
We installed the split collet, flipped the wheel upside down, selected the small driver, then installed the driver into the collet with a shop hammer. IMPORTANT: When installing the driver into the split collets, installation must be done on against a solid work surface. Solid ground, wooden blocks, or non-flexing surfaces all help the driver seat into the collet.
With the driver seated into the collet (will not move side-to-side easily), move the wheel to a raised stand or wooden blocks. The wheel bearing can then be pushed out effectively and past the surface the wheel is placed on. To drive out the bearing, use controlled and well placed strikes on top of the installed driver, the wheel bearing should start to move in the bore. You can take a peek at the bottom side of the wheel hub and check for movement. If the split collet is pushing through the wheel bearing, you may need to reset, and reinstall the split collet with driver. To note, this process can take several attempts to firmly grab the bearing, upon reinstalling the wheel collet and driver, restart this process until you see the bearing move. Once captured by the collet and moving, keep driving and the old wheel bearing will be pushed out of the wheel hub and remain on the collet.
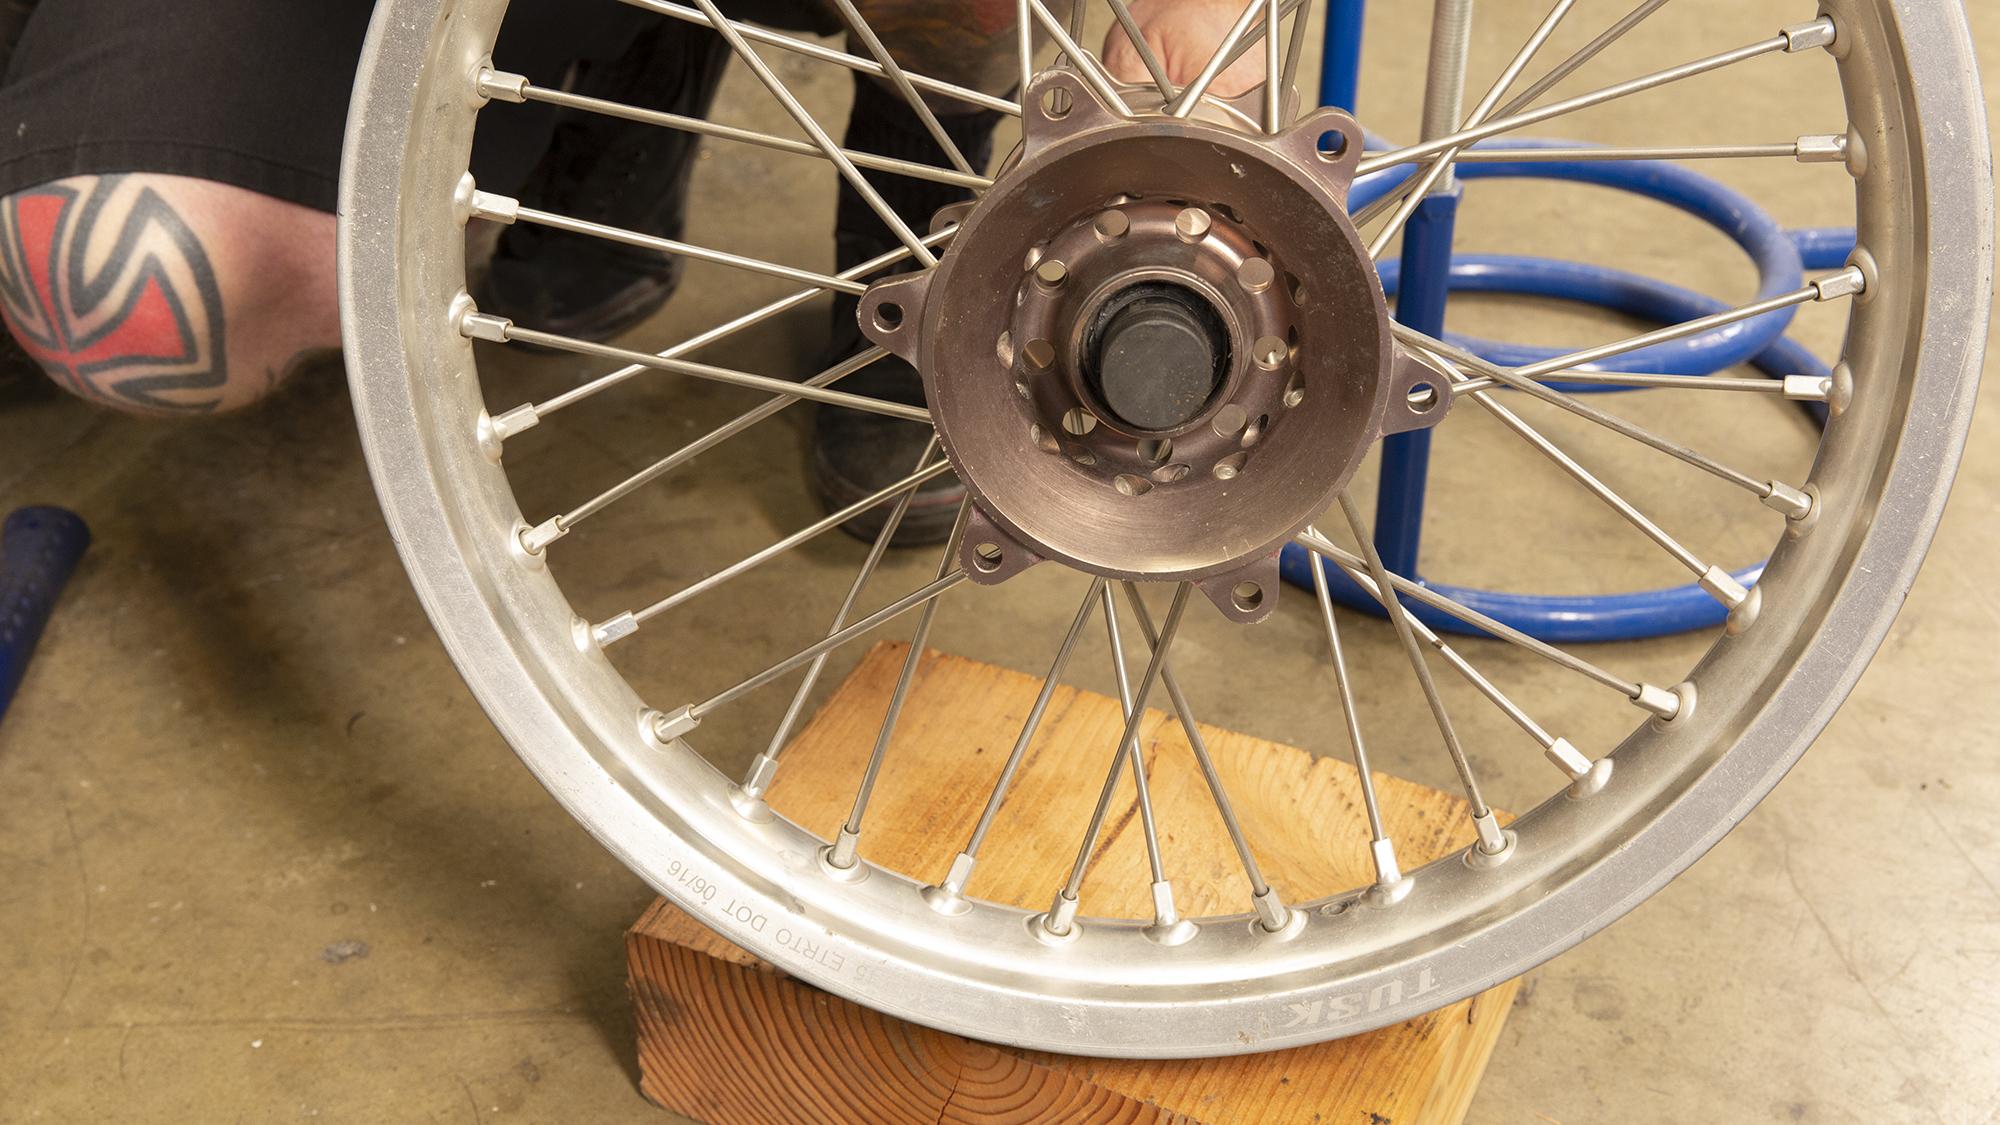
4. Repeat the steps for the opposite side of the hub
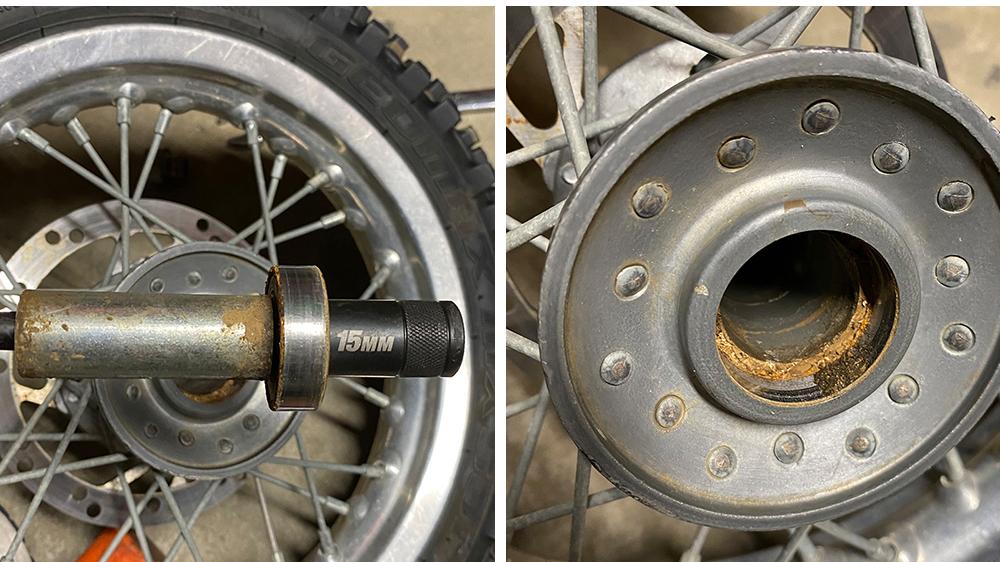
The job for wheel bearing removal is almost complete! Simply, repeat step 3 above on the opposite side of the hub for removal of the remaining wheel bearing(s).
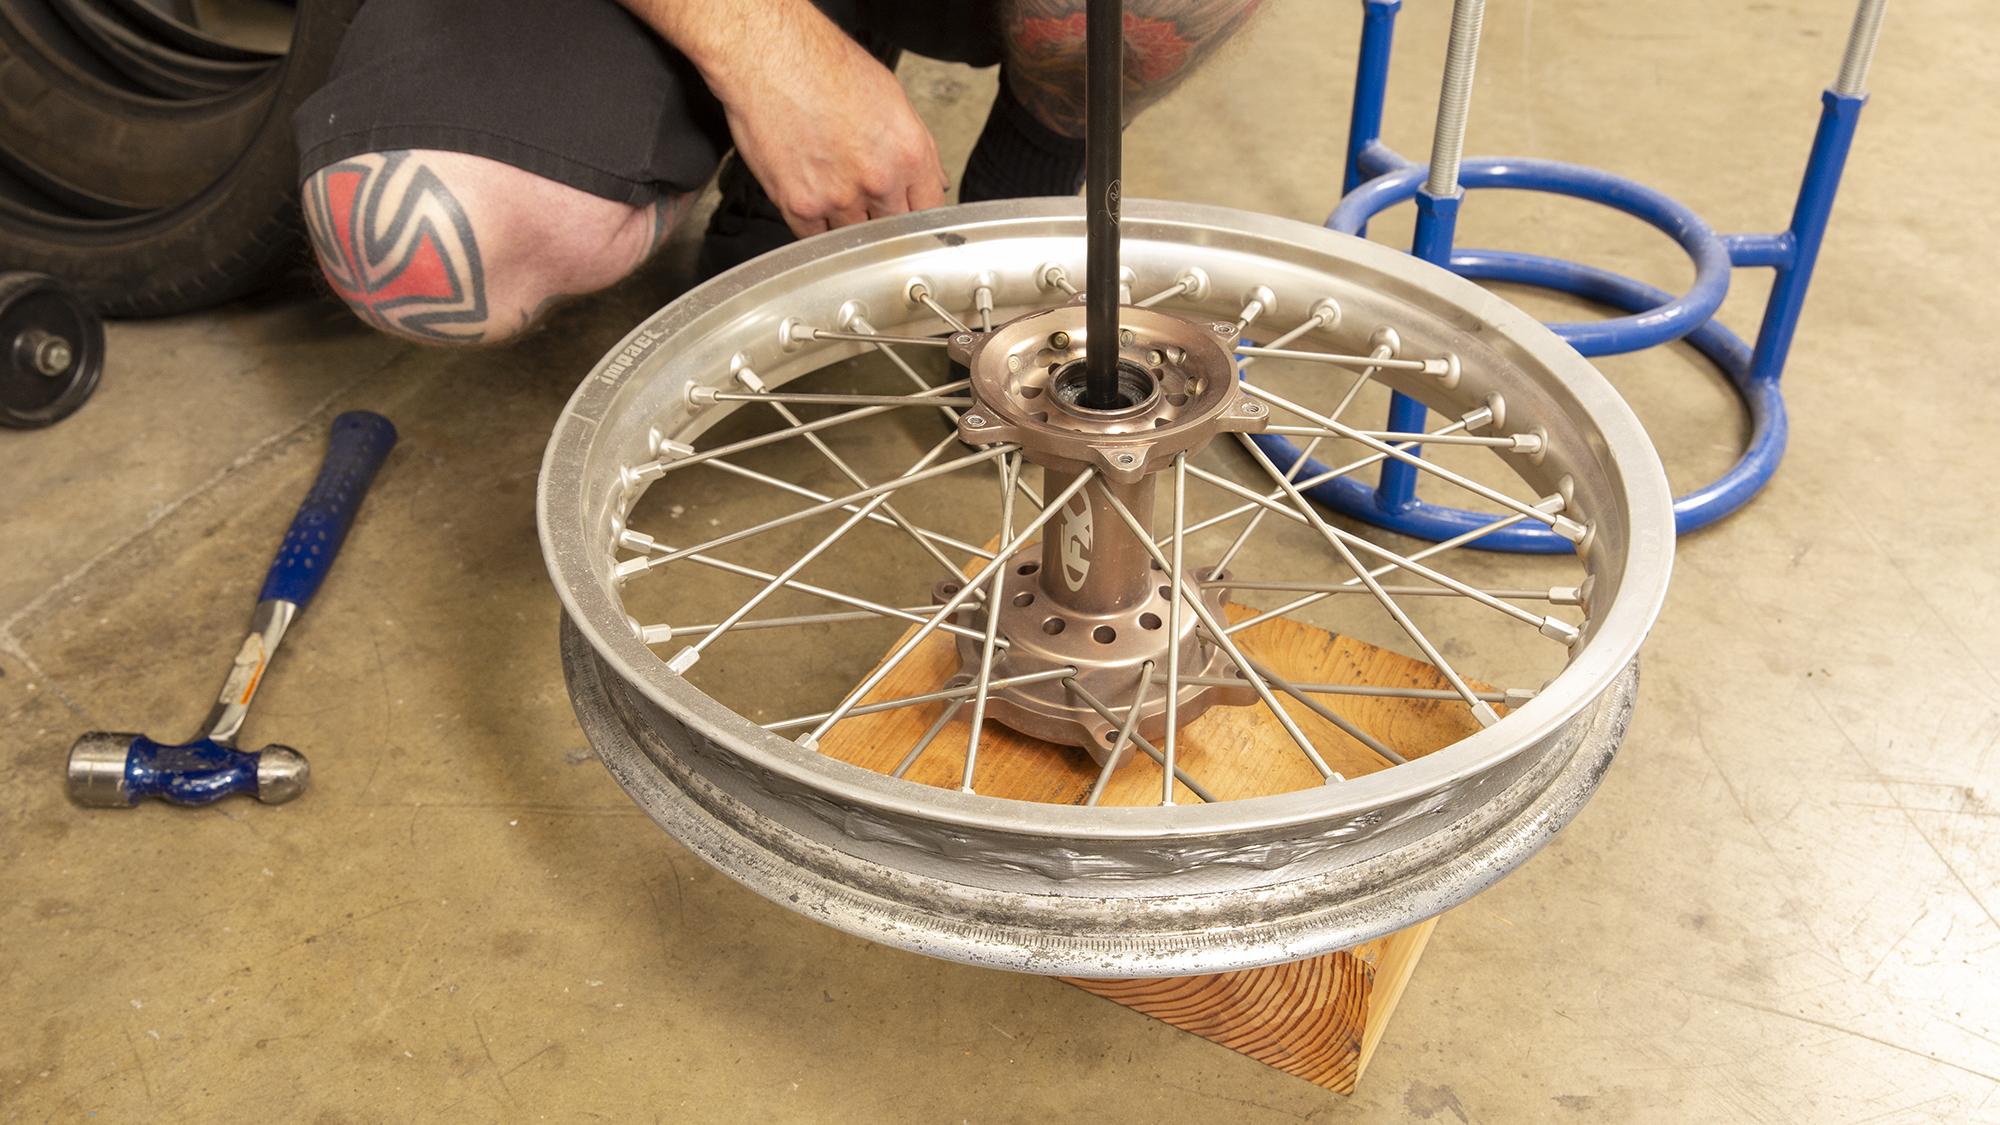
5. Job complete, Install new bearings
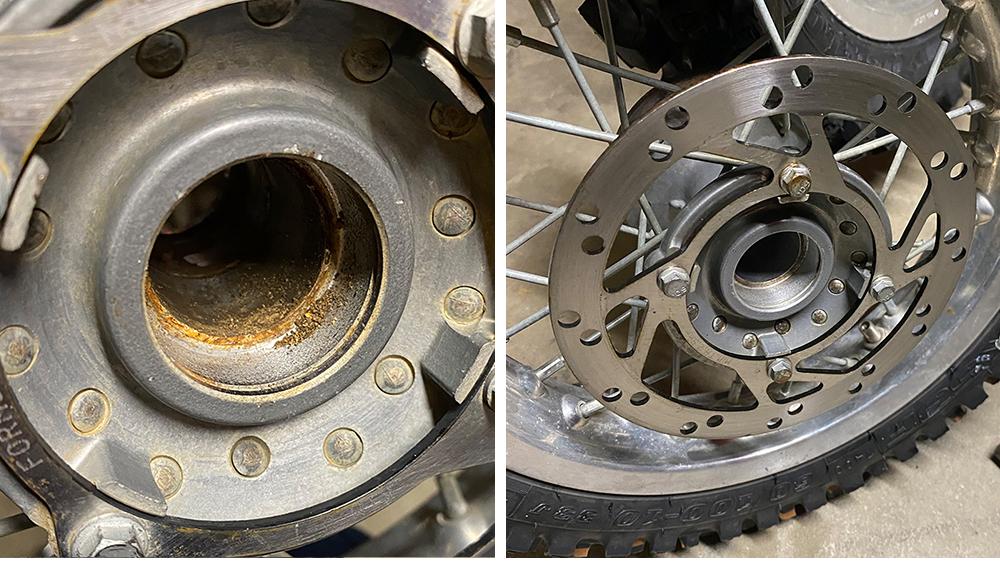
With the main task now complete, installation of the replacement wheel bearings can get started. As shown above, clean up the existing wheel components and internal bearing bores for reassembly. For installation of the new bearings, Motion Pro offers a specialty tool for this job, our 08-0551 Bearing Driver Set, is shown for new bearing installation. The Motion Pro Bearing Driver Set features a driver and assortment of metric adapters to accommodate a wide range of bearing combinations. Below, use of this tool is shown.
We will cover use of this driver set in a future article, stay tuned to our blog section for the latest articles and videos from Motion Pro.
SHOP ALL WHEEL BEARING REMOVERS
More examples of the Motion Pro Wheel Bearing Remover Set in progress
A block of wood can be used or suitable solid surface when seating the driver into the collet.
In severe cases, heat will be helpful, before starting wheel bearing removal
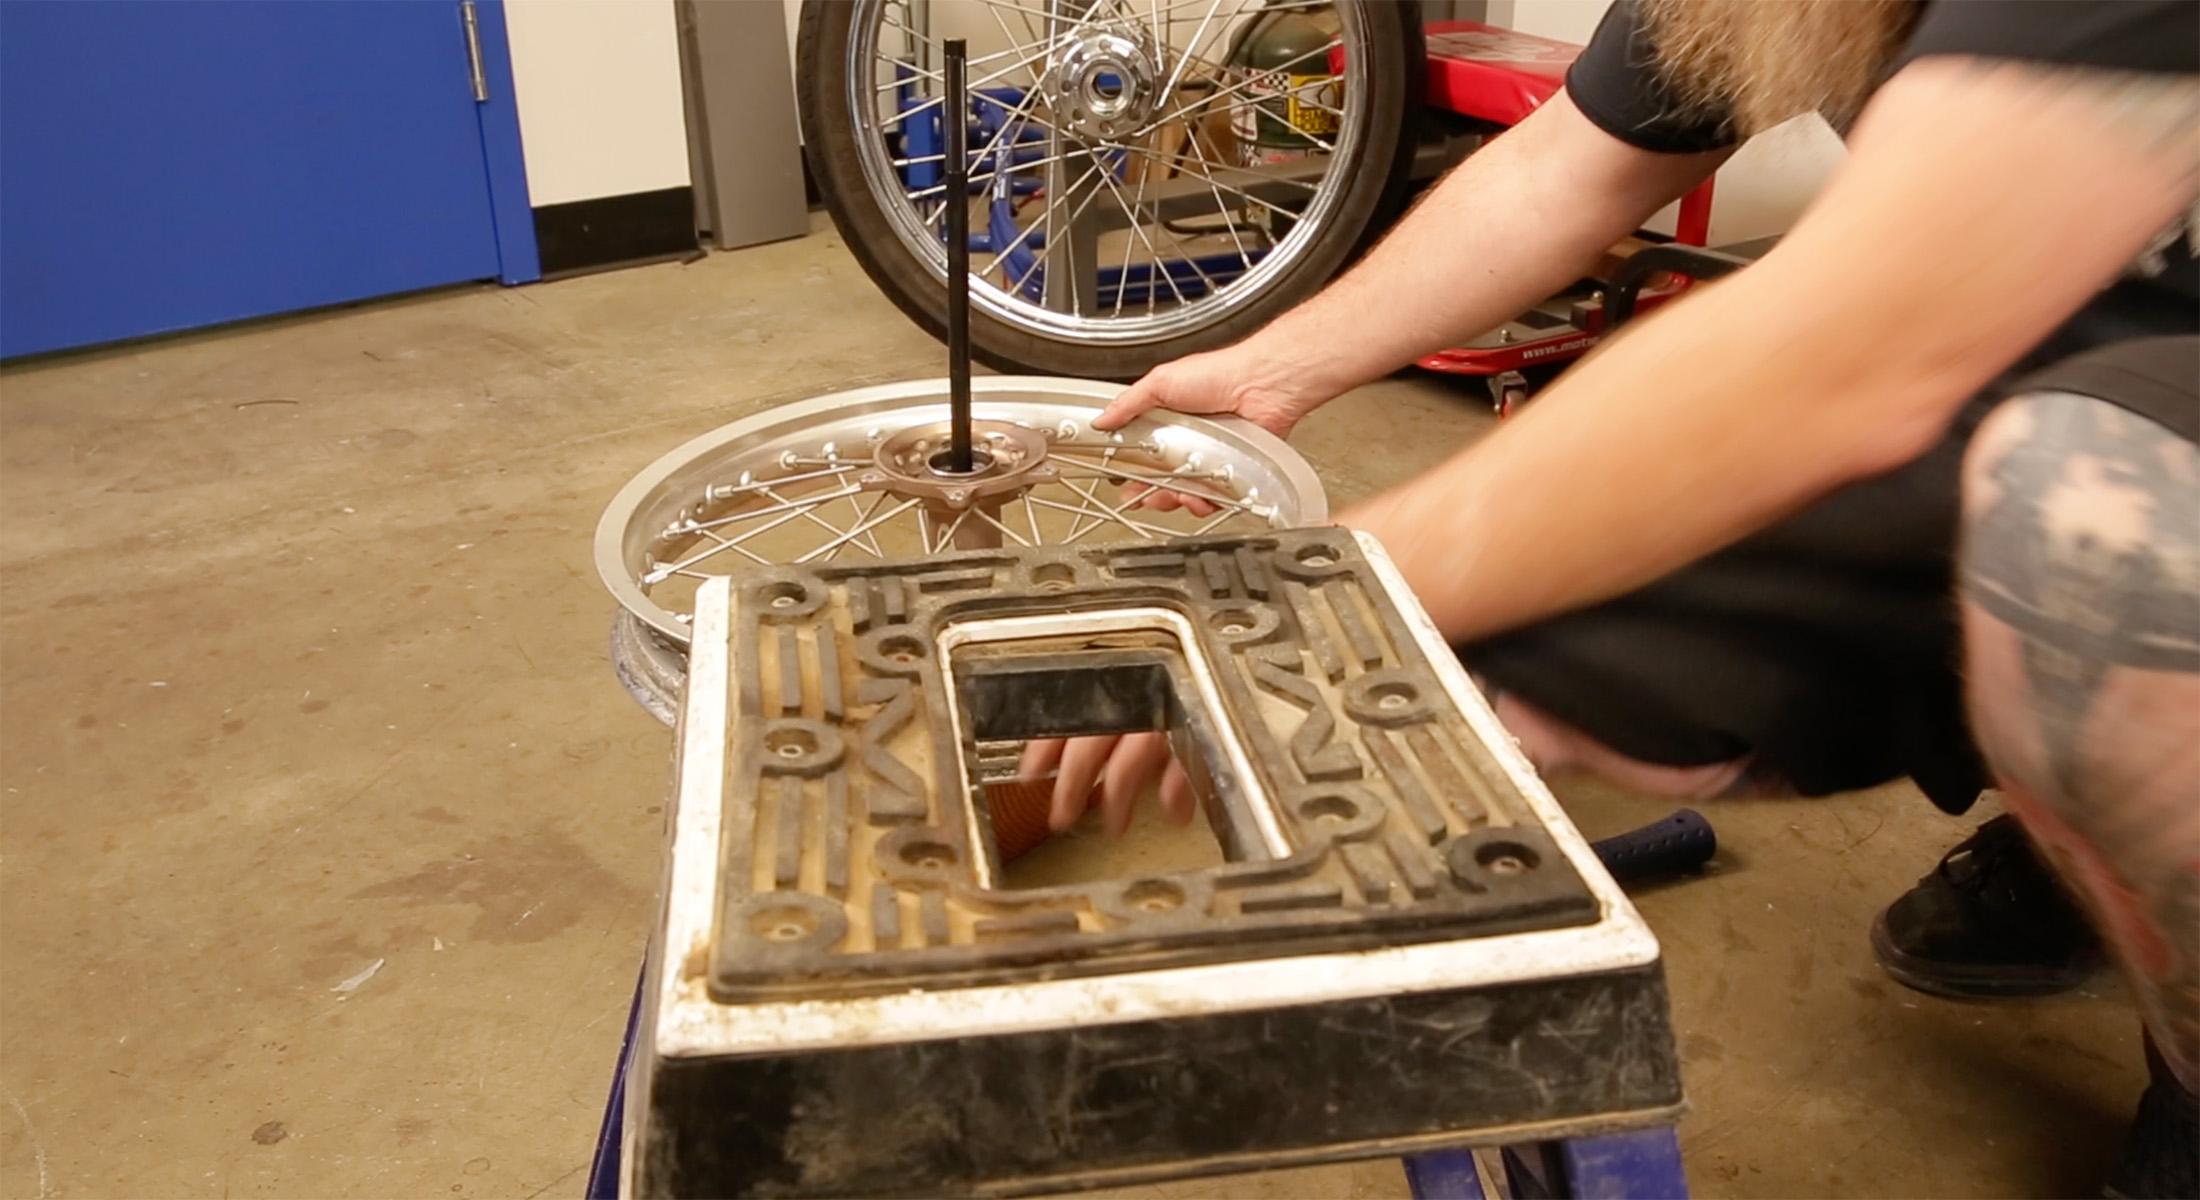
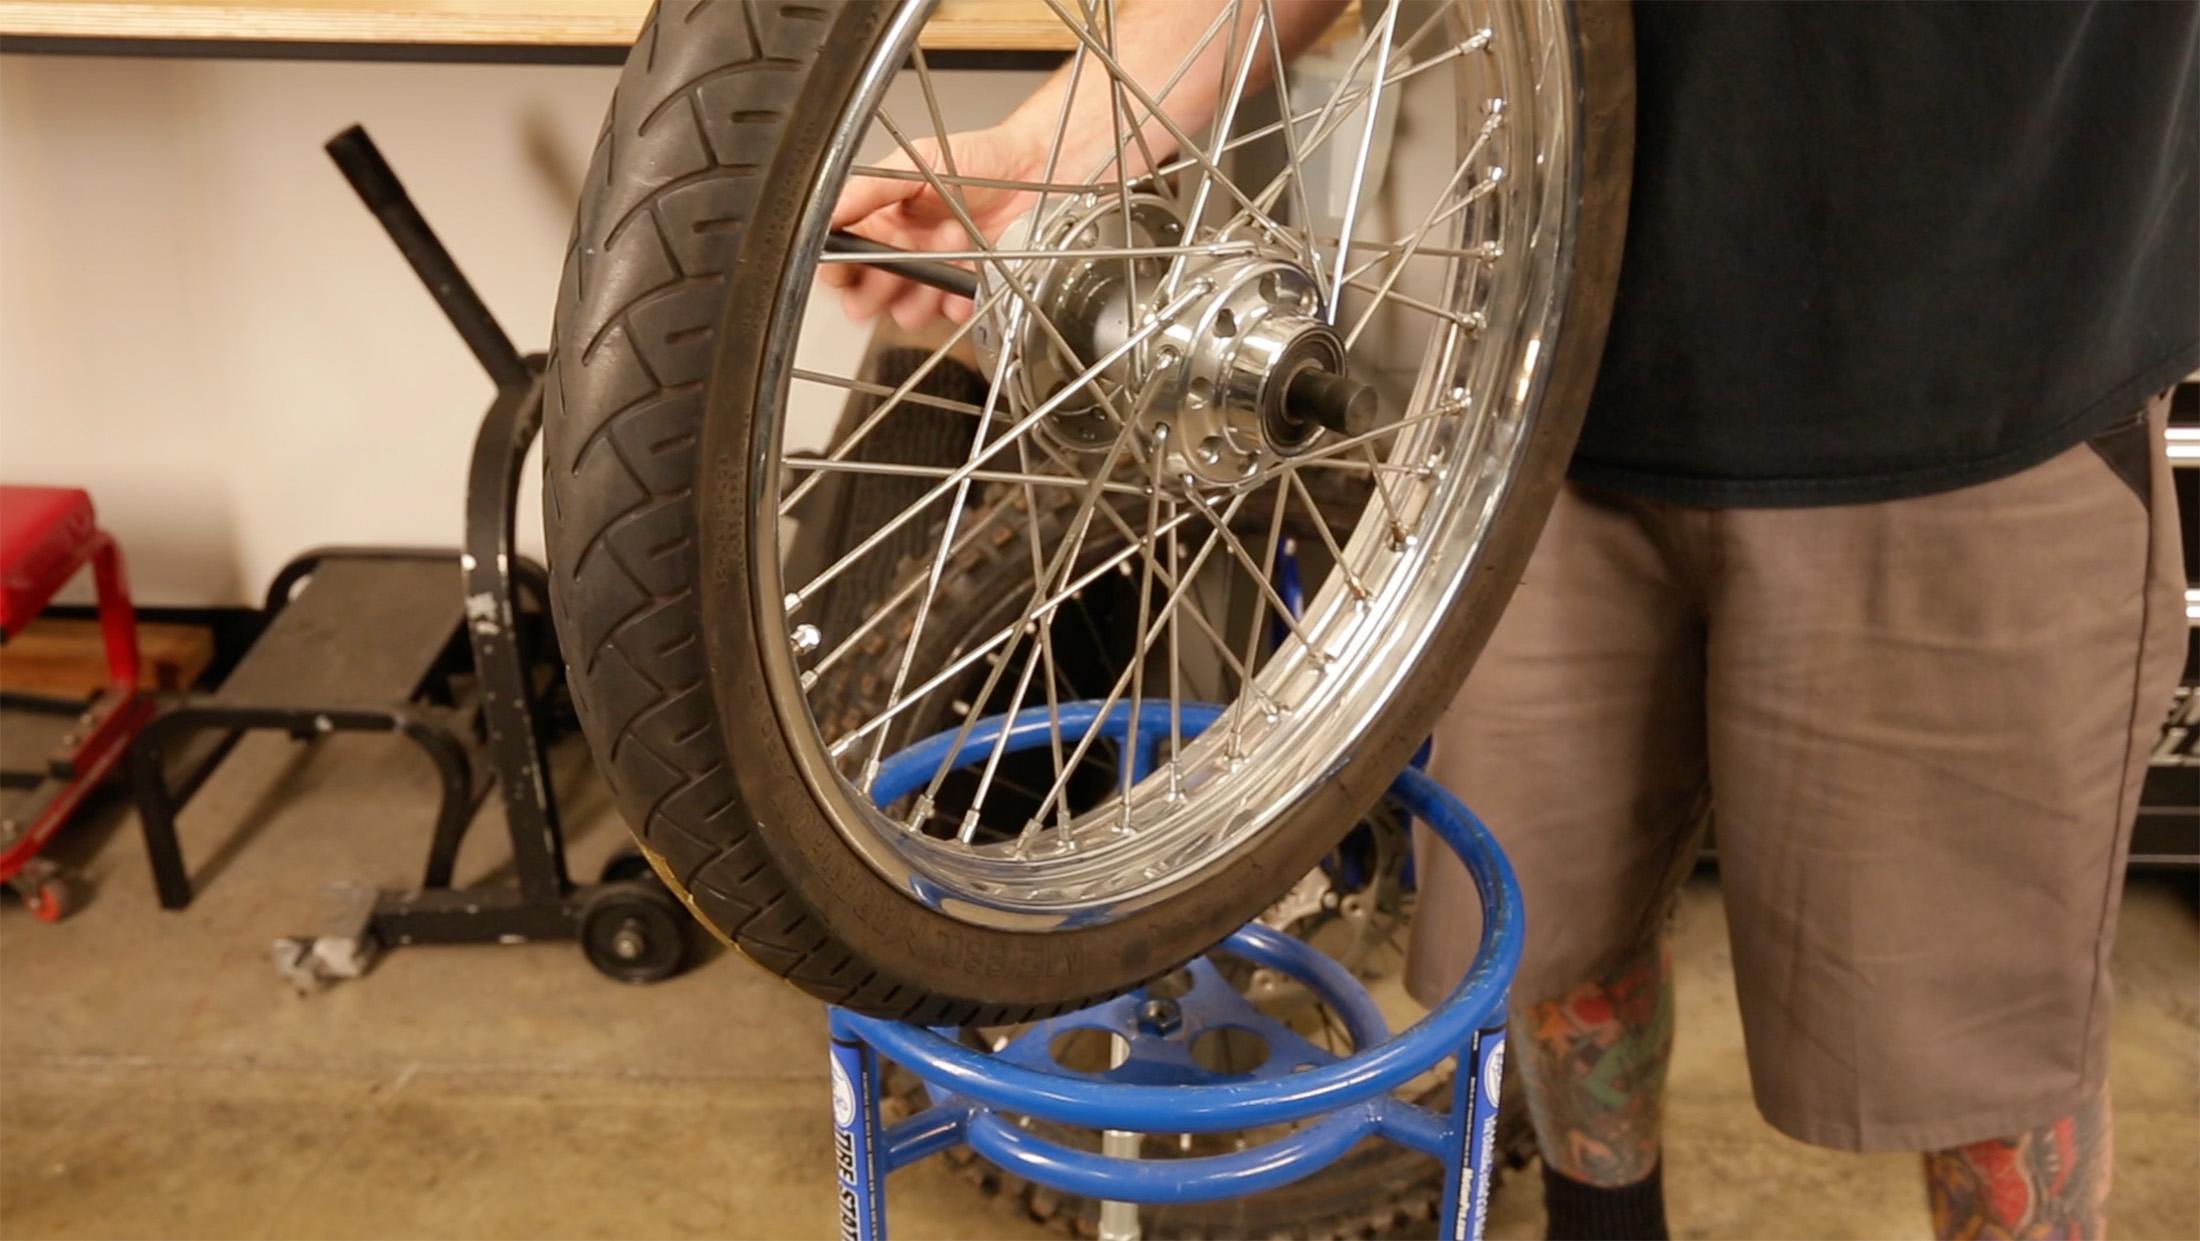
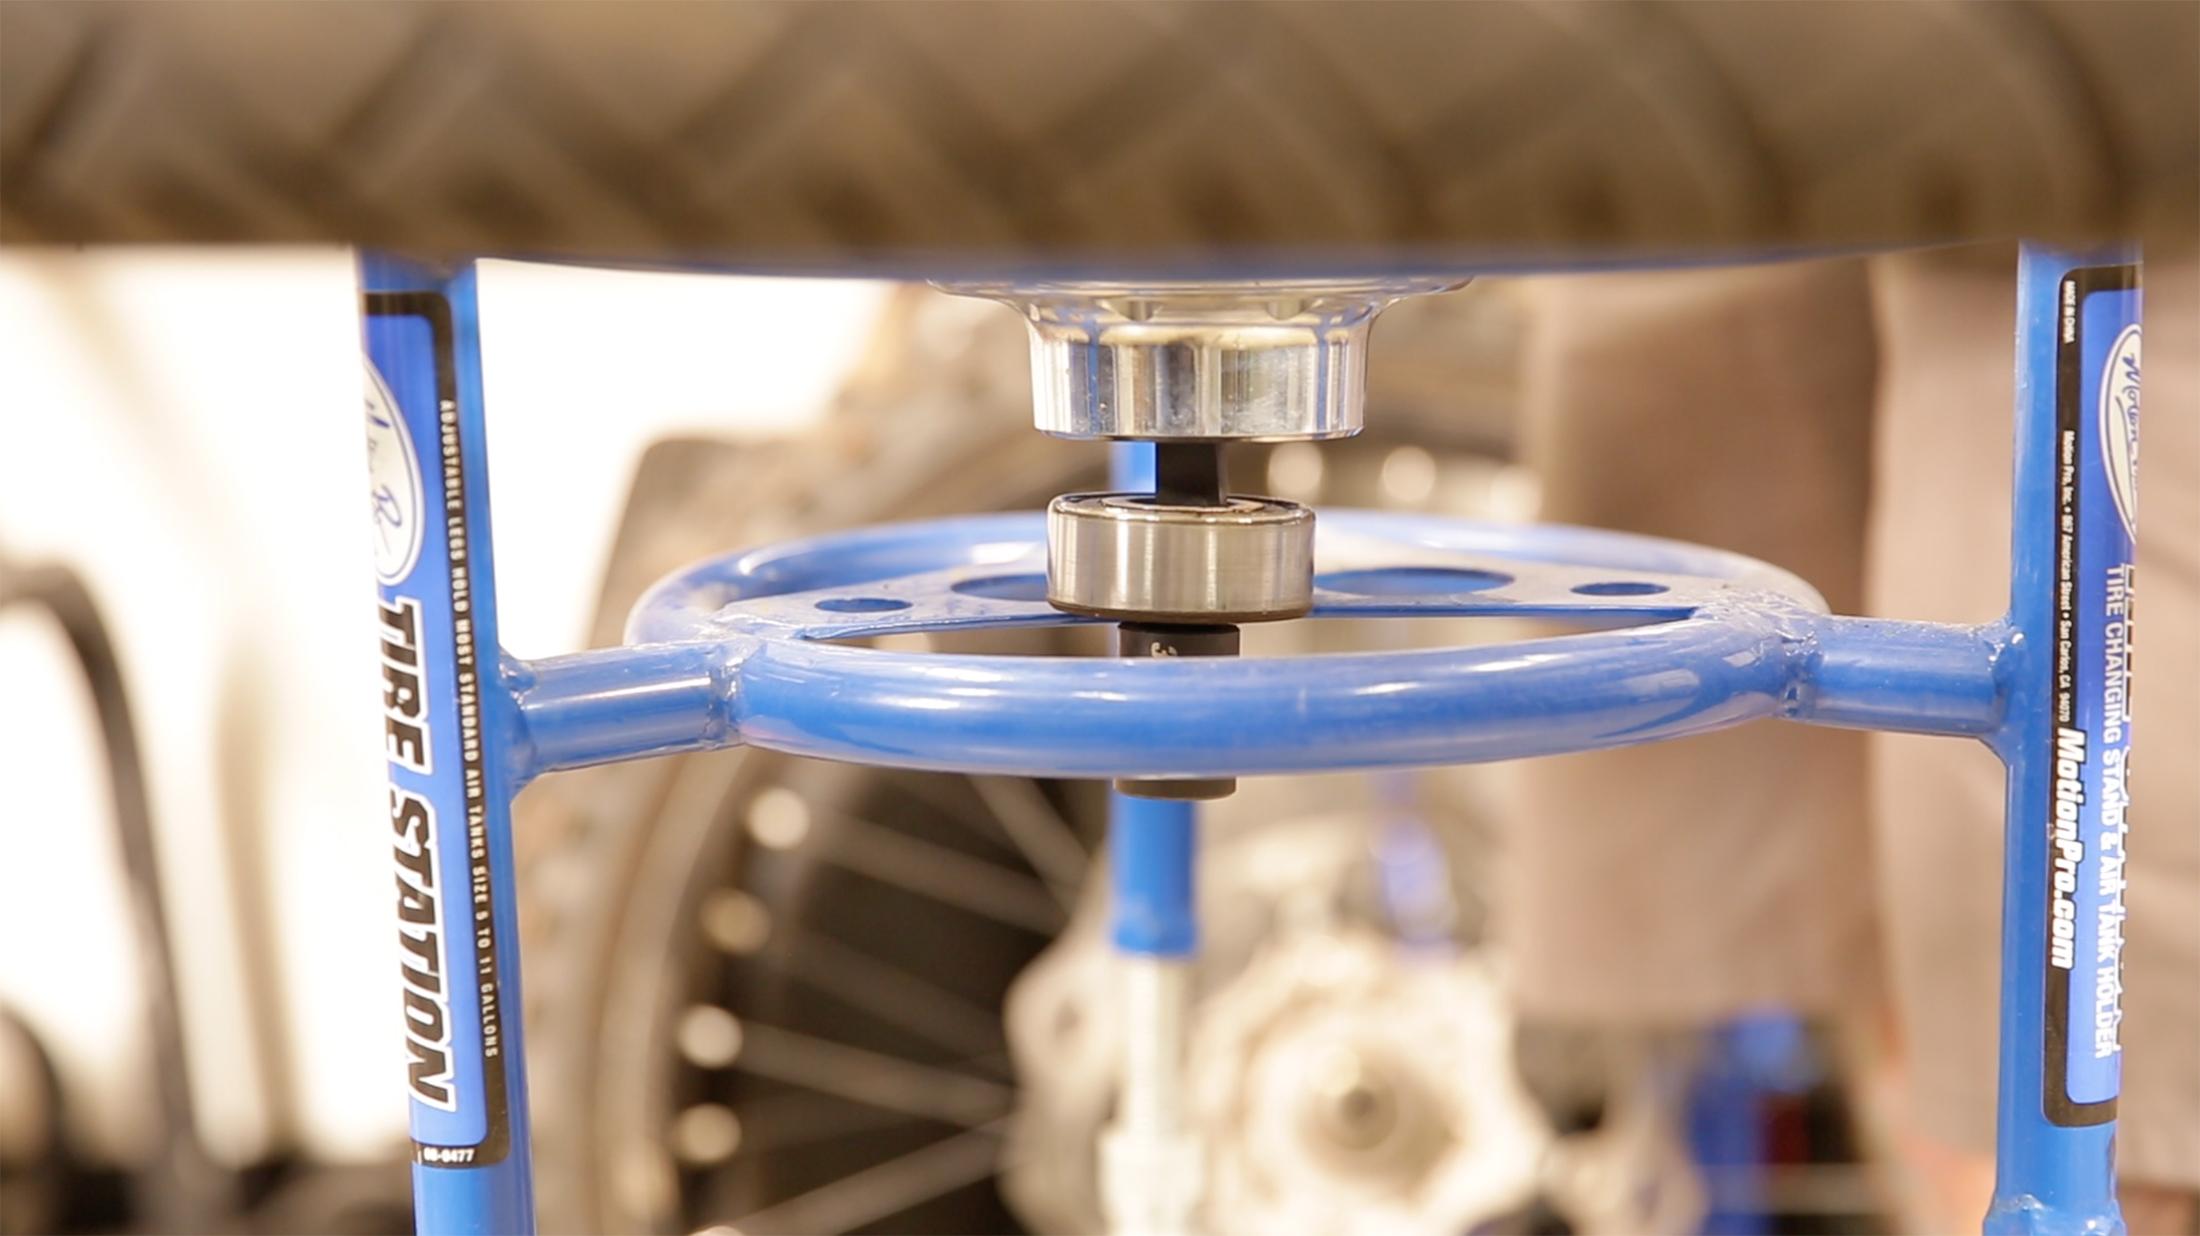
A motorcycle stand, or wheel changing stand is helpful when driving out the wheel bearings. A center hole in the stand is necessary to allow the driver and split collet to push out the wheel bearing from the bottomside of the wheel hub.
American V-twin Wheel, using the 08-0410 set

For a step by step how-to video with the Motion Pro Wheel Bearing Remover Set, see below:
Motion Pro shows you our Wheel Bearing Remover Set, and how this specialty tool makes removal of old or damaged wheel bearings, quick and easy when working on your motorcycle.